Help Center > Leave Module
Steps for Getting Started with Leave Module
INTRODUCTION
Employee module is used to complete the onboarding process seamlessly, keep track of active and relieved employees, and perform the offboarding process.
Sub – Modules
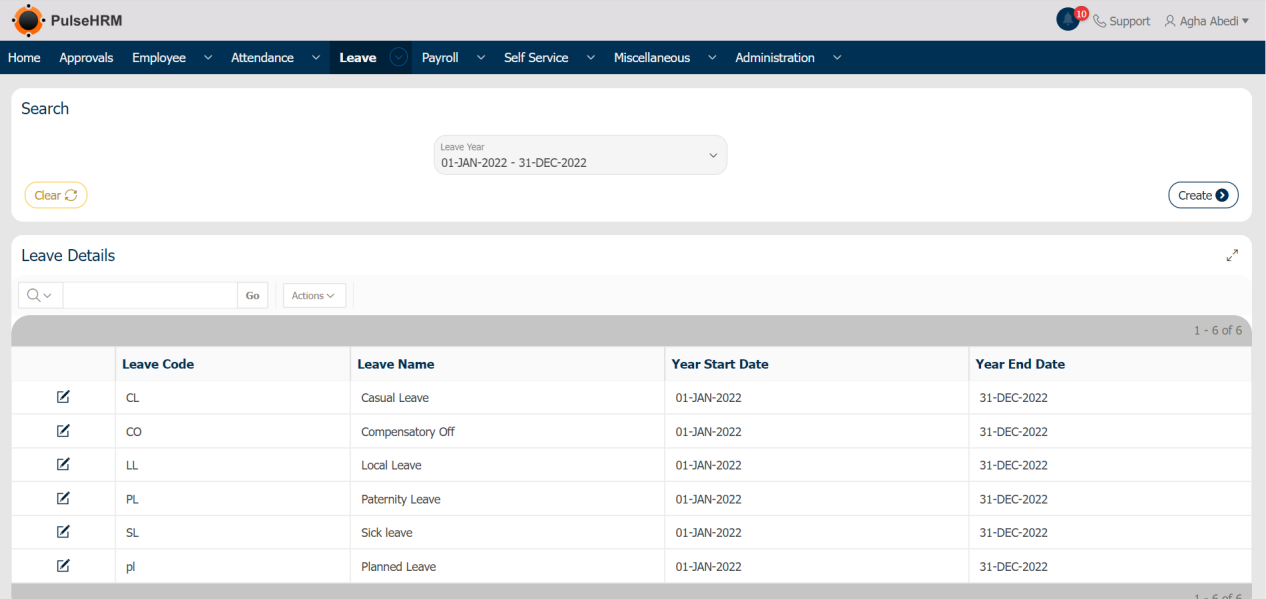
1) Define Leave Type
According to the company’s leave policy, all leave types offered can be created, along with the entitlement and applicability settings.
To create the leave type, go to:
Leave -> Click on Create->Enter Leave Details->Select Applicability->Select Entitlement->Save
Note: Once saved, the Leave code cannot be edited.
Under Leave Applicability
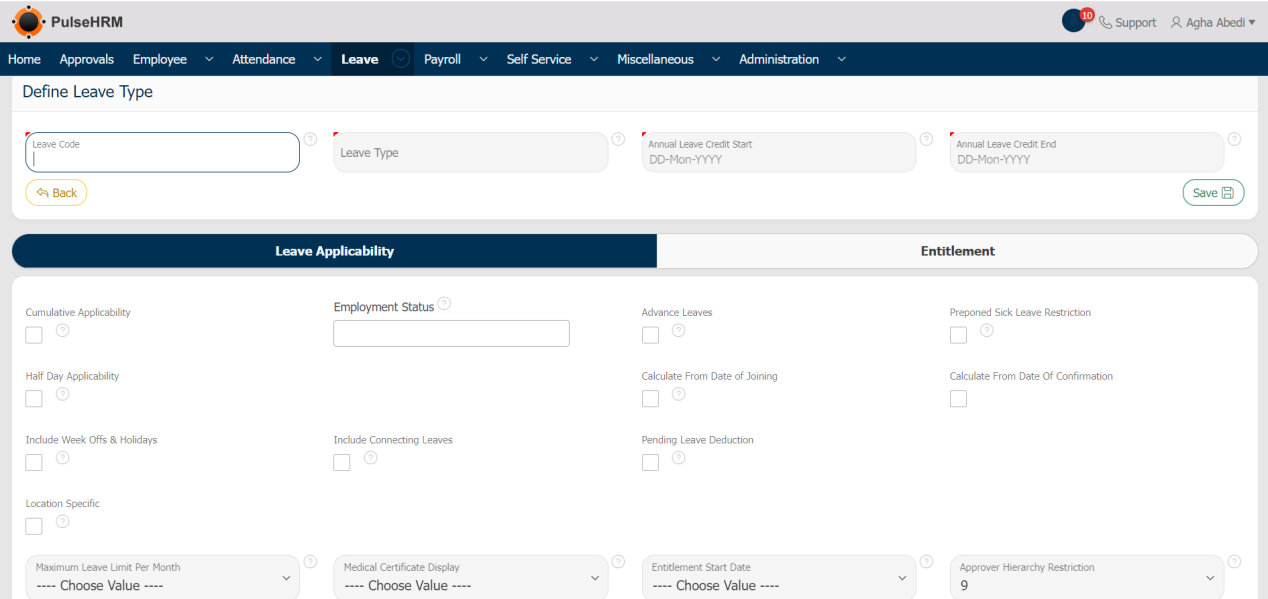
If Cumulative Applicability is selected, all employees, regardless of their employment status, will be eligible for the leave and the Employee Status box will be hidden. Any specific employee status, such as confirmed, probationary, trainee, intern, etc., may be applied to the leave if cumulative applicability is not selected.
Advance Leave: Select this option if you want your employees to apply for leave even when their leave balance is zero. The negative balance will be adjusted from the future entitlement.
Prepone Sick Leave Restriction: Select this option if you don’t want your employees to apply for leaves in advance. This is normally selected for sick leave as the sick leave cannot be applied in advance.
Half Day Applicability: Select this option to enable employees apply for a halfday leave from that leave type.
Calculate from DOJ: The leave entitlements will be added from the Date of Joining after employee confirmation
Calculate from Date of Confirmation: The leave entitlements will be added from the Date of confirmation after employee confirmation
Calculation from Year Start Date: Leave entitlements will be added from Leave start date(either from Calendar year or from financial year) irrespective of employee DOJ
Include Week Offs & Holidays: If an employee tries to apply leave before and after the week off / public holiday, then the week off / public holiday will be considered as leave.
Include Connecting leave: If this button is checked, if an employee tries to apply leave before or after the week off / optional holiday / public holidays; the before and after day will also be considered as leave. Ex: If an employee tries to apply leave on 1st of October, then the system will consider both 2nd of October and 30th of September as leave.
Pending Leave deduction: The leave balances will be deducted from employees current balances even though the leave is not yet approved, if you select this option.
Location Specific: Select this option if you’re providing leaves on location basis and the employees from that particular location only will be entitled to avail this leave type.
Restrict Probationer Employee: Select this option to restrict the employees who’re still in probation from availing this leave.
Restrict Notice Period Employee: Select this option to restrict the employees who’re serving their notice period from availing this leave.
Notice Period: Select this option to enable only notice period employees to avail this leave.
Maximum Leave limit per Month: Select the maximum number of leaves an employee can avail in a month. Limits can be set according to the leave policy.
Medical Certificate Display: This option helps you in getting the medical certificate from employees who’re applying for sick leaves more than the no. of days selected in the dropdown.
Entitlement Start Date: This box displays from when the leave entitlement needs to be added
Approver Hierarchy Restriction: The hierarchy of the approval for the particular leave should be selected.
Impose Application: If an employee takes leave without first applying for it, it may be because of an emergency. The system will not allow the employee to apply for leave if they do not submit their application for leave within the specified number of days. For instance, suppose an employee requests leave today simply by emailing the reporting authority and not requesting it through the system the leave is not recorded and it’ll be treated as a non-payable day. The employee must apply for leave as soon as they return from vacation before the days specified in the Impose application column; otherwise, the system will prevent them from doing so.
Leave Pre-Intimation Days: Enter the no. of days before which you want the employees to apply for the leave.
Gender: If the leave type should be applicable only for any particular gender it can be selected like male, female, transgender, etc.(check whether Transgender is there or Others is there)
Marital Status: If the leave is applicable to only for particular marital status like single, married, etc.
Under Entitlement
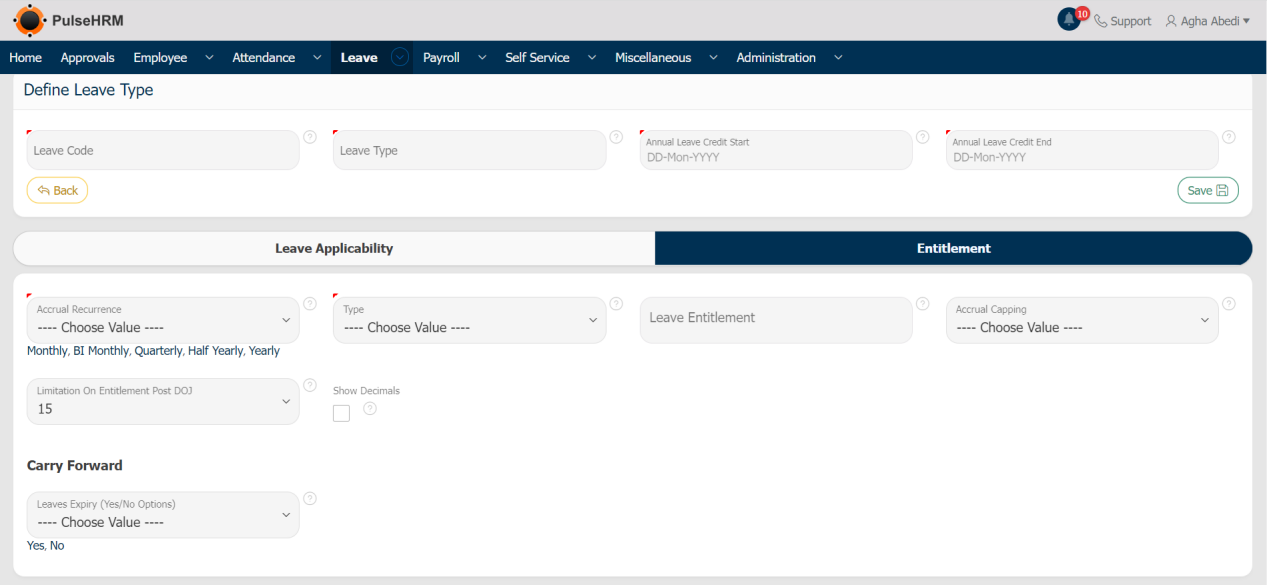
Accrual Recurrence: When should the balance be added to the leave like monthly, quarterly, yearly, etc.
Type: There are four type:
- Regular Balance: The entitlement can be given.
- Comp-Off: If comp-off is selected then an extra column will appear, which indicates the expiry of the comp-off which means the comp-off should be used with the mentioned no. of days else the comp-off balance will be cancelled.
- Experienced Based: With the years of experience the leave will be added.
- Optional Holiday: Most of the organization provides 2 days of optional holiday yearly.
Leave Entitlement: Enter the no. of leaves to be added based on the accrual recurrence.
Accrual Capping: Restriction on applying leave. If the employee has 10 leave but the accrual capping is selected as 5, then the employee can apply only for 5 days of leave even though the balance is present. Because employee can able to see only 5 balances
Limitation on entitlement Post DOJ: Example, if we kept this as 15, If the employee joins between 1 and 15, the balance will be added else the leave balance will not be added. And if the employees relieves between 1 to 15 then balance will not be added
Show decimal: If the leave entitlement is added with decimal values like 1.5. If the show decimal is selected, the leave balance will be displayed with the decimal values.
Without Pro-rata: Irrespective of the date of joining, the leave will be available for the employee.
Carry forward: If Yes is selected, the leave balance will not be moved to the next year. If No is selected, how many no. Of leave balance needs to moved to the next year should be mentioned. Select Save
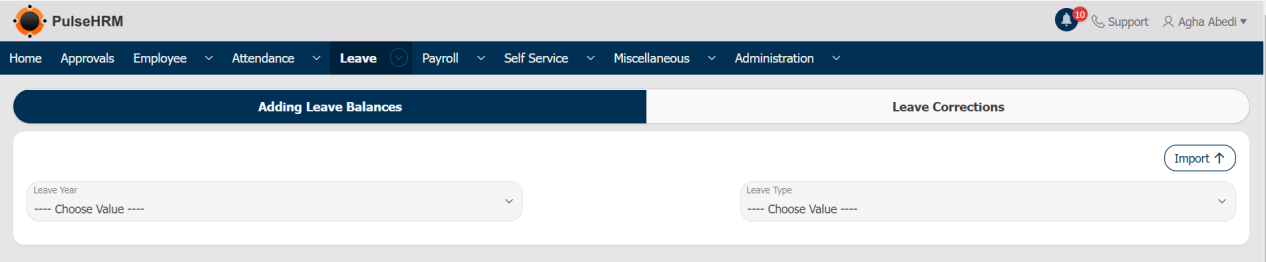
2) Balances & Corrections
The admin has the access to add or delete the leave balances of any particular employee.
To add the leave balances, go to:
Leave -> Balances & Corrections (Admin) -> Adding Leave Balances -> Select Leave Year and Leave Type else click on Import button to download the template -> Add the data and Save it ->Browse for the same and click on Import Data.
To deduct the leave balances, go to:
Leave -> Balances & Corrections (Admin) -> Leave Corrections -> Select Leave Year and Leave Type else click on Import to download the template -> Add the data and Save it -> Browse for the same and click on Import Data.

The data can be imported using the templates
Adding Leave Balance

Deducting Leave Balance

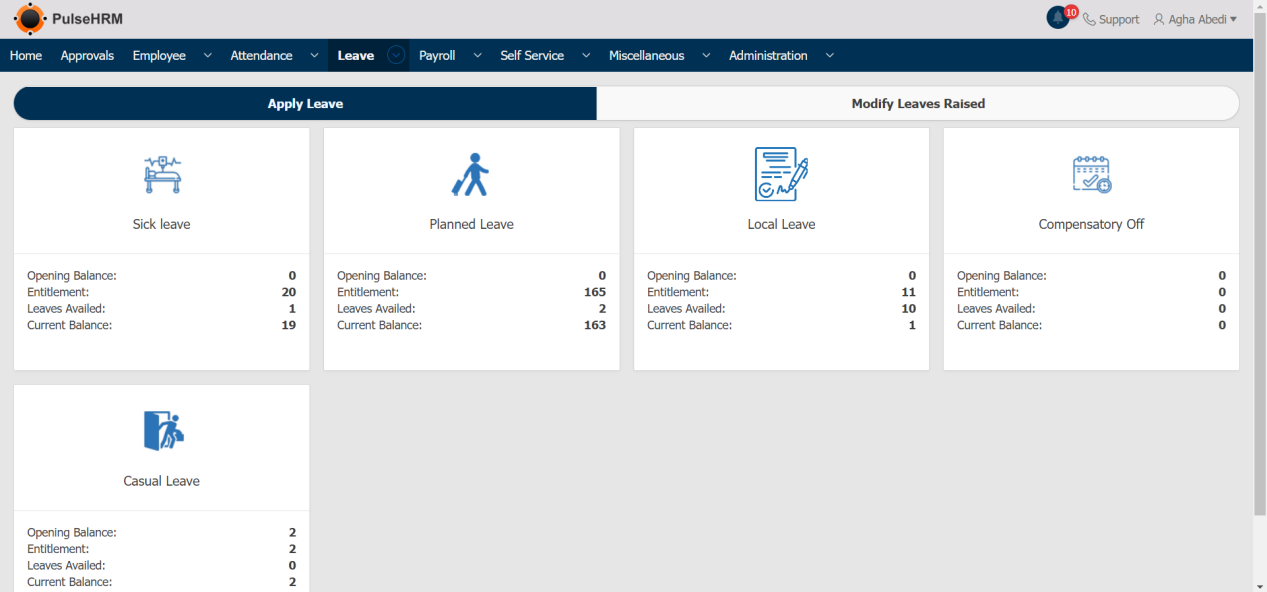
3) Apply & Modify
The employee can be apply for leave and cancel the applied leave, if it is still in pending state.
To apply for leave, go to:
Leave -> Apply & Modify -> Apply Leave -> Select leave type -> Enter the details -> Click on “Apply”.
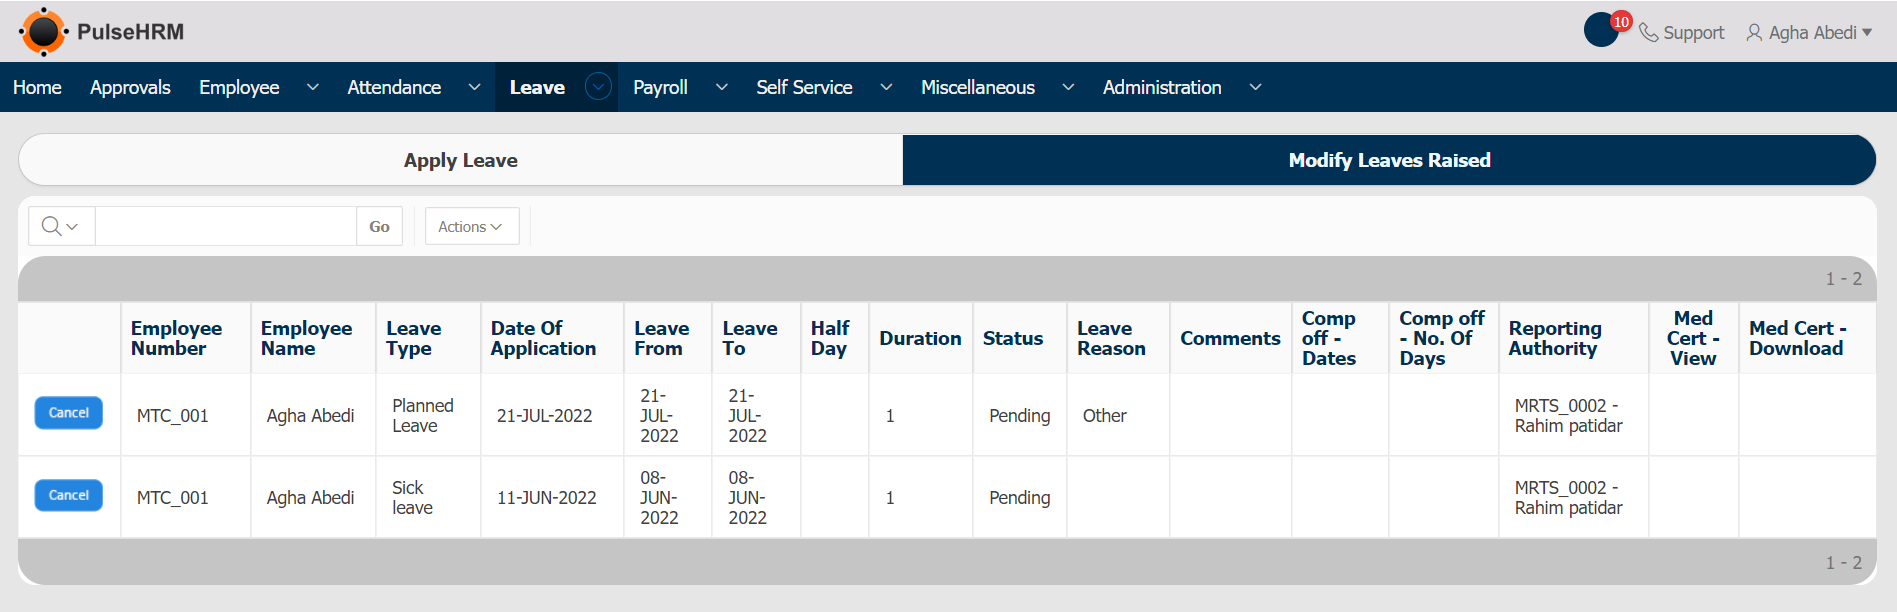
The Applied leave can be cancelled until it is in pending state.
To cancel the applied leave, go to:
Leave -> Apply & Modify -> Modify Leaves Raised -> Click on the Cancel button.
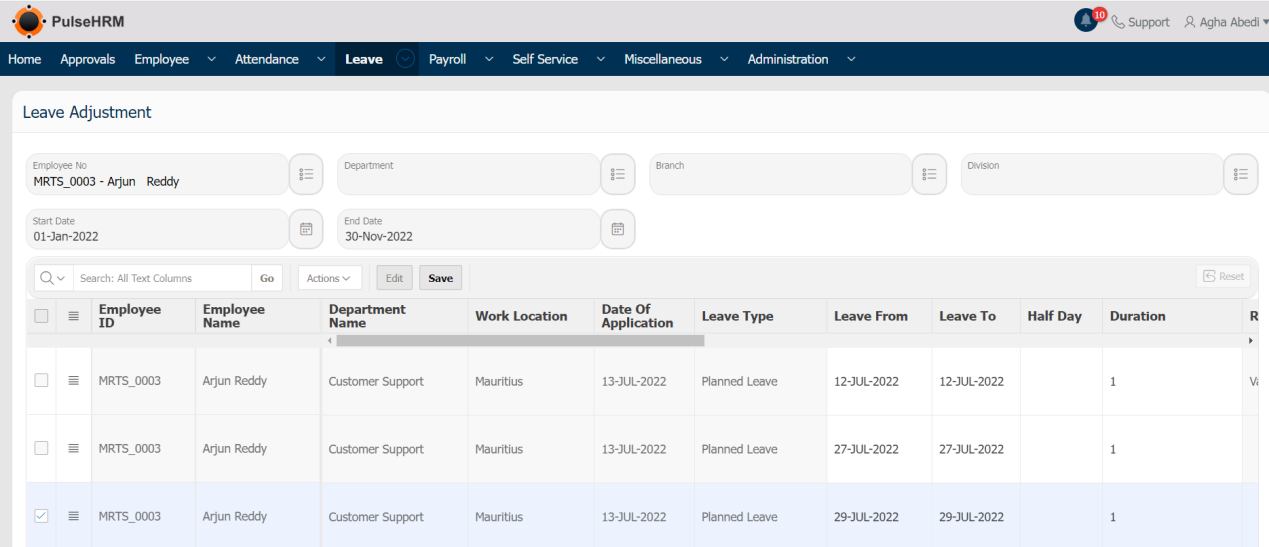
4) Leave Adjustment
Extending or Shortening of the approved leave can be done here.
To perform the mentioned action, go to:
Leave -> Leave Adjustment -> Enter the data -> The list of approved leave will be displayed -> The admin can edit the leave from and leave to dates -> Click on Save.
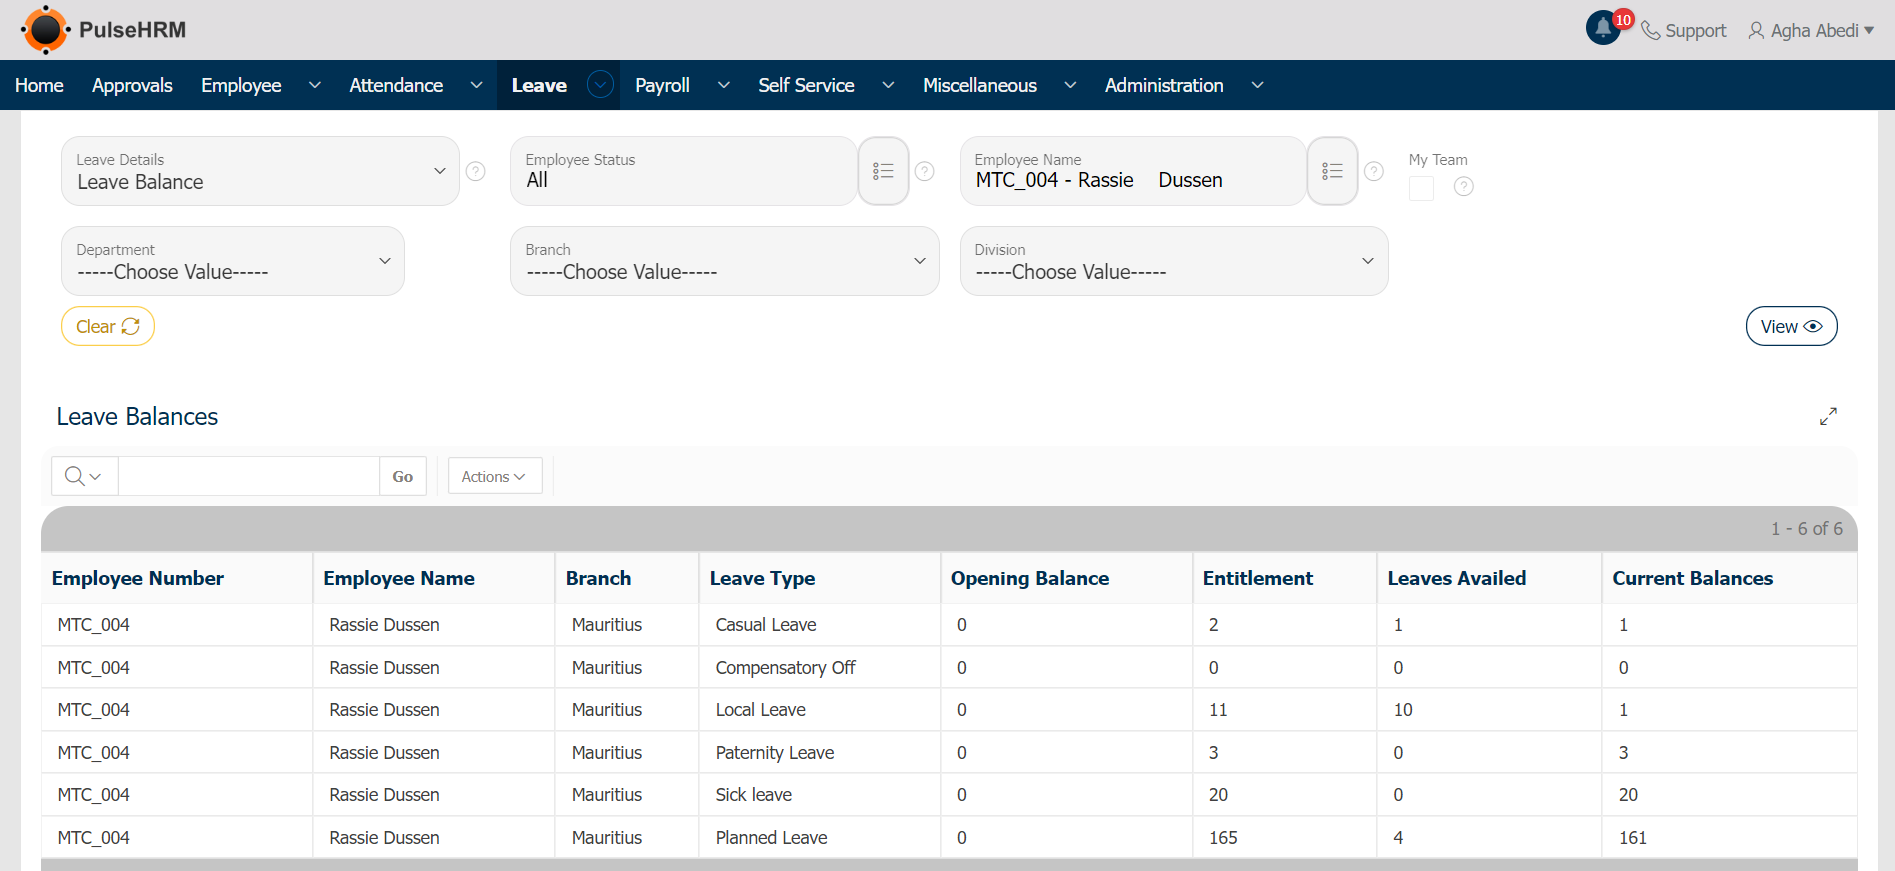
5) Reports
The leave balance and the leave history of the employees can be viewed from the reports page.
To view the leave balances and history of the employees, go to:
Leave -> Reports -> Select either “Leave Balance” or “ Leave History” -> If My Team check box is selected, the report of all the employee will be displayed else for the selected employee will be displayed.
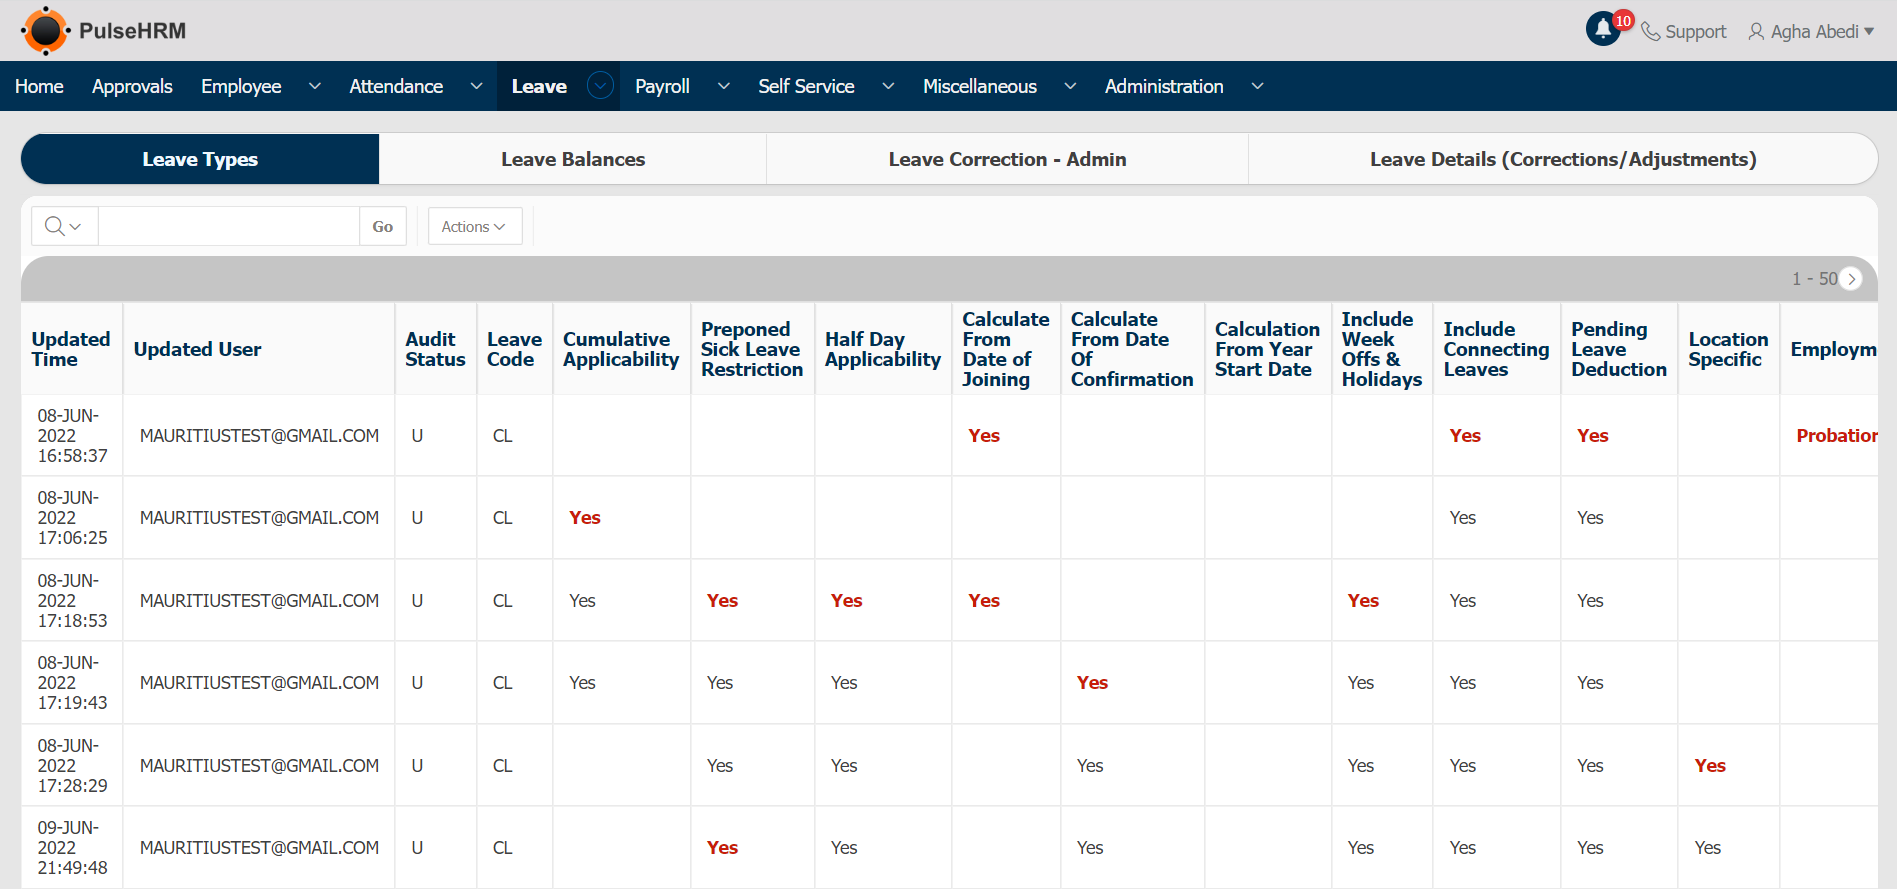
6) Audit Report
It displays the changes done in the leave type, leave balance, leave correction and leave details(correction/adjustment) pages; if any any changes has been done by the employee, the updated record will reflect in red colour.
To view the audit report, go to:
Leave -> Audit Report.
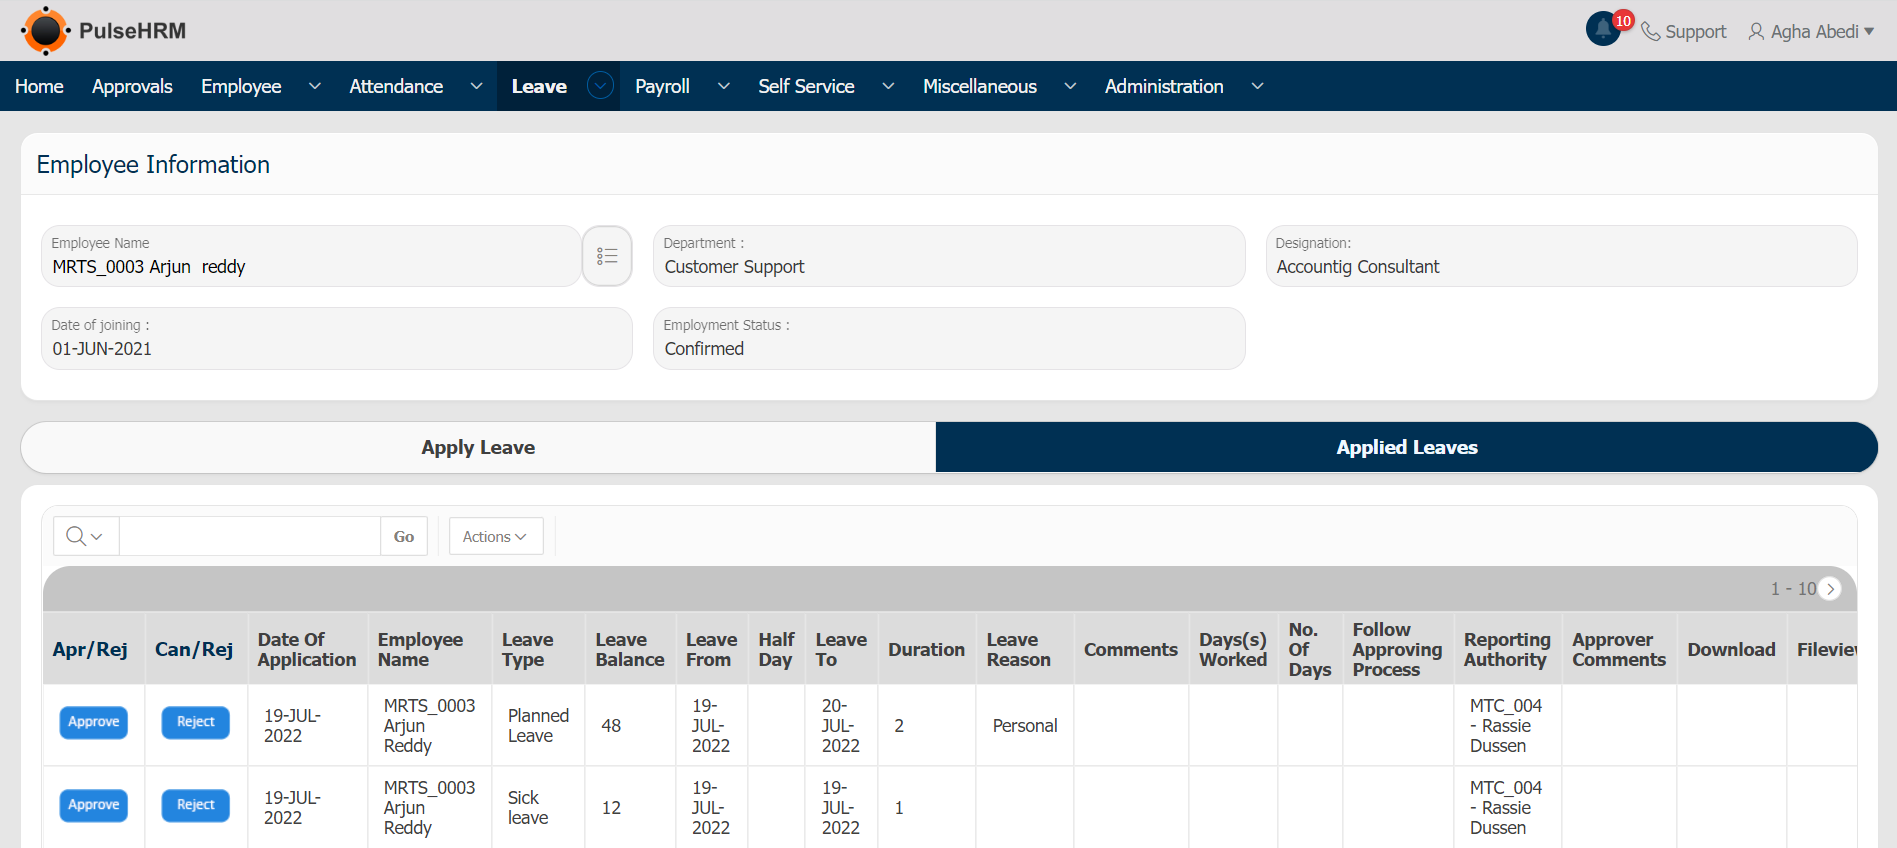
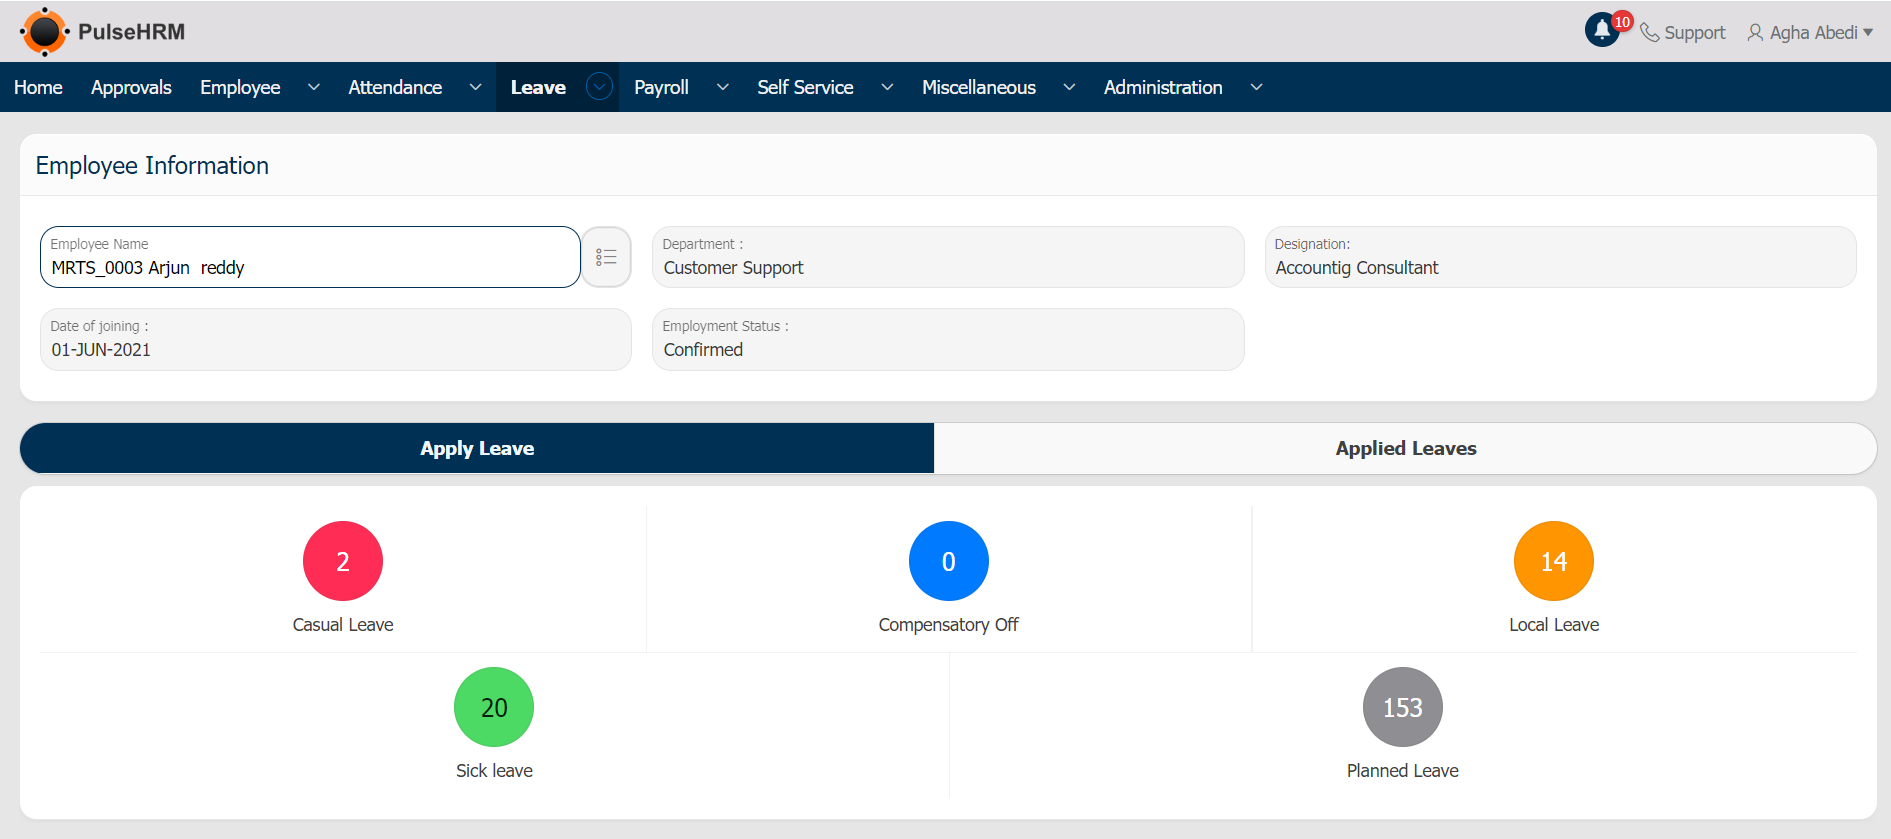
7) Leave Corrections
The admin can apply for leave on behalf of the employee using the leave corrections page and the approved leave can also be cancelled by the admin.
To apply the leave for an employee, go to:
Leave -> Select “Leave Corrections” page -> Select “Apply Leave” tab -> Click on the particular leave type -> Enter the details -> Click on “Apply” button.
To cancel the applied leave, go to:
Leave -> Leave Corrections -> Select the “Applied Leaves” tab -> Click on either reject or cancel button to cancel the approved leave.