Help Center > Employee Module
Steps for Getting Started with Employee Module
INTRODUCTION
Employee module is used to complete the onboarding process seamlessly, keep track of active and relieved employees, and perform the offboarding process.
Sub – Modules
A) ON BOARD
Before the letters being sent to the candidate, the email configuration page and define template page in the administration module needs to be completed.
1) Shift & Roster
- To begin with the on boarding process, go to:
Employee -> On board -> Pre-Signed - Enter the required details and select the required template from the drop down. If any file needs to be attached, the option is available to upload the same.
- Check the selected letter and edit if required, then click on “Apply Changes”.
- The background of the letter will be changed, then click on “Submit” button
- The Candidate will receive the offer letter in the mentioned mail with the temporary credentials.
The acceptance of offer letter is of 3 stages:
i) Accept the Offer letter
ii) Submit the On boarding Survey
iii) Submit the Employee Basic Details form
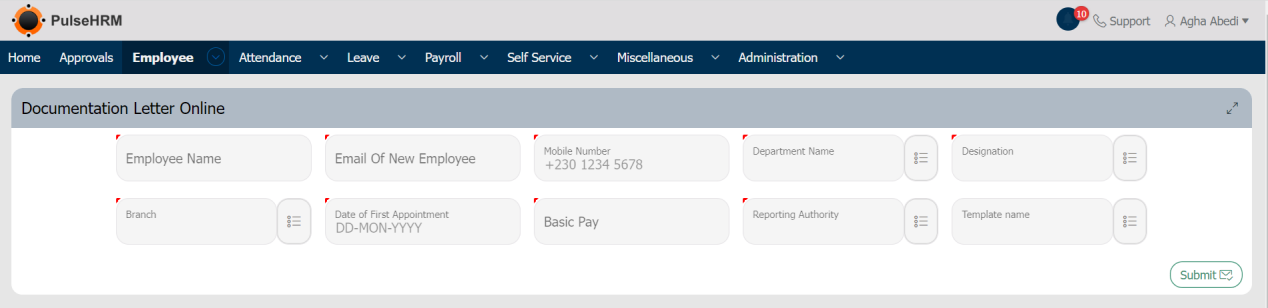
- Employee Name: The Name of the candidate
- Email of New Employee: The email ID to which the letter should be sent should be entered.
- Mobile Number: The Contact number of the candidate should be entered.
- Department: The Department for which the candidate is selected should be selected from the drop-down.
- Designation: The Designation fro which the candidate is selected should be selected from the drop-down.
- Branch: The location where the candidate has to work should be selected.
- Date of First Appointment: The date of joining of the candidate should be selected.
- Basic Pay: The monthly salary value should be entered.
- Reporting Authority: Once the candidate joins the organization, the RM for the candidate should be selected.
- Template Name: The letter which needs to be sent should be selected from the drop-down. The template can be created in the administration module of define template page.
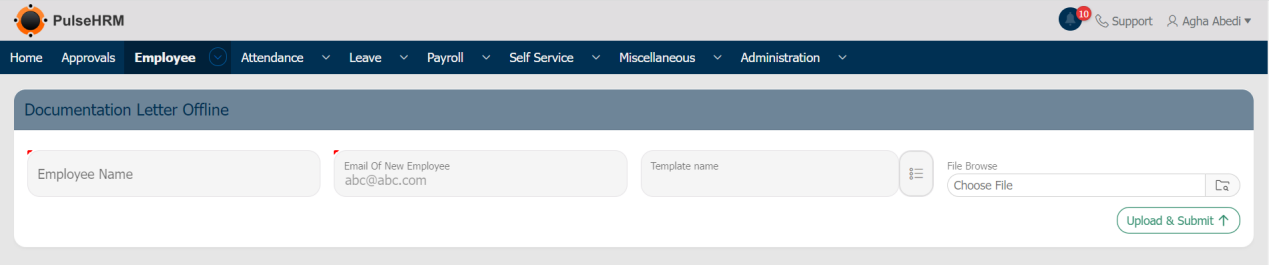
2) Offline
The Offline option functions the same way as the pre-signed whereas the HR can save the letter locally after clicking on “Apply Changes” button where the document can be saved in the local folder; Select the file from the search field and upload and submit the same.
To send the on-board letter through offline method, go to:
Employee -> On Board -> Offline.
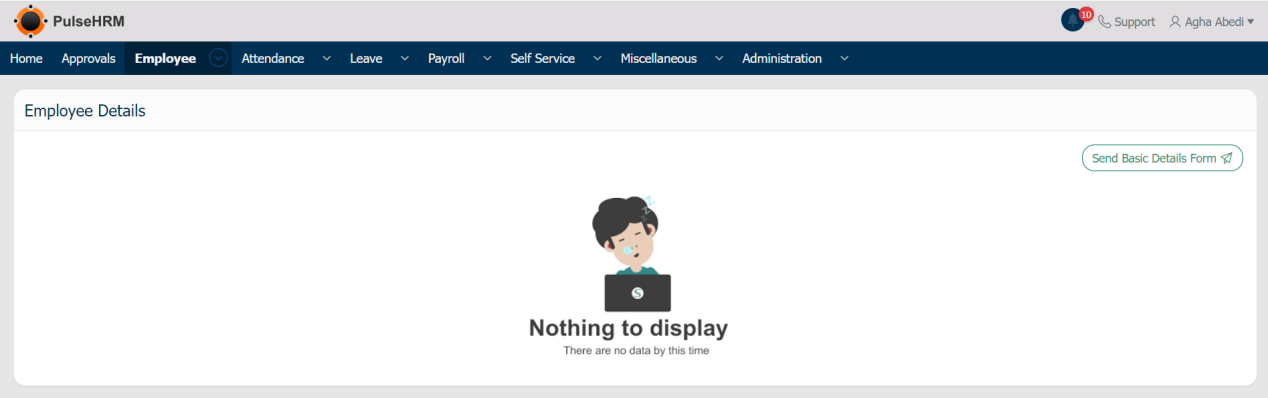
3) Employee Details Form
In the email configuration page, if the employee details page is not selected. Then during the on boarding process, the employee details page will not be sent. This option is used to send that particular file to the candidate manually after the acceptance of the on boarding letter.
To send the Employee details page, go to:
Employee -> On Boarding -> Employee Details form -> Select the Employee -> Click on Send Basic Details Form.
B) Employee Management
The Employee Management modules maintains the details of all the employees of the organization.
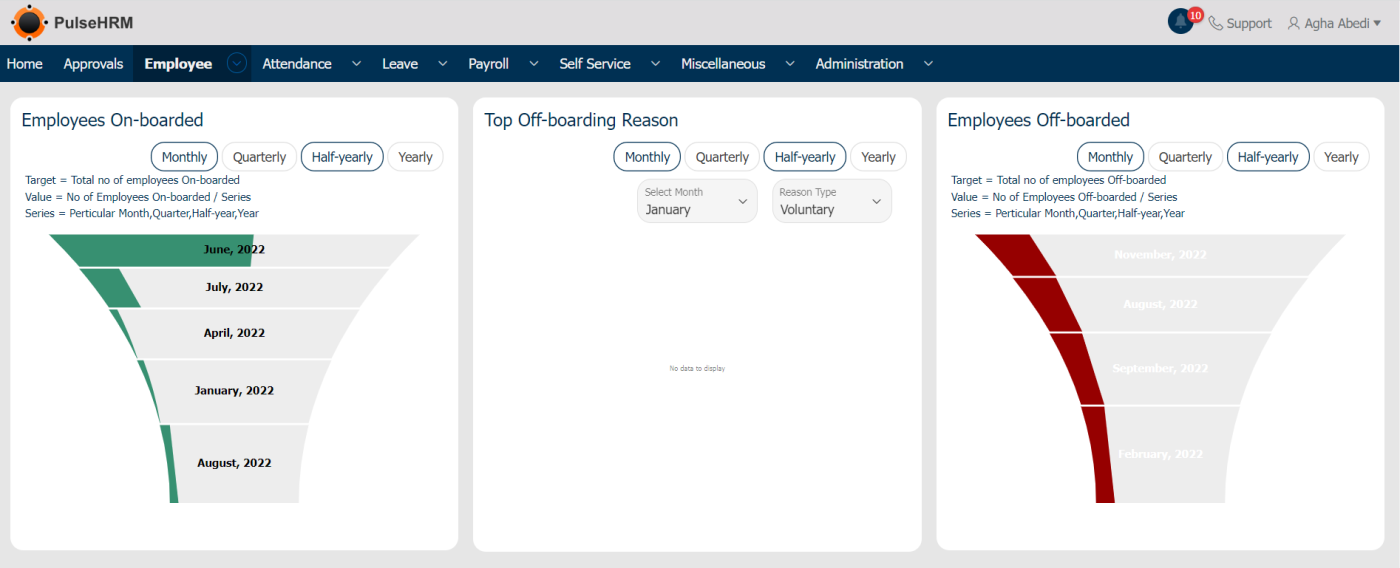
1) Dashboard
The dashboard represents 3 tabs. The Employee On-Boarded tab displays the no. Of employees on boarded into the organization. The Top Off-Boarding Reasons tab displays the top most reason for the relieving of the employee from the organization. The Employee Off-boarded tab displays the no. Of employees relieved from the organization.
To view the dashboard, go to: Employee -> Employee Management -> Dashboard.
2) Add / Edit Employee Details
This option is used to add a new employee into the portal or edit the details of the existing employee of the organization.
To add the employees into the portal, go to: Employee -> Employee Management -> Add/Edit Employee Details -> Select New Employee -> Click on Next.
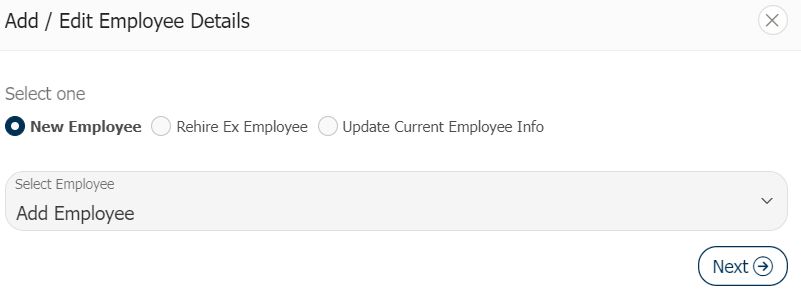
The New Employee option is used to add new employee into the organization.
The Rehire Ex Employee option is used to hire the ex employee of the organization.
The Update Current Employee Info option is used update the details of the existing employee of the organization

Restrict User: The Employee record will be added into the portal; but the login credentials will not be generated as the user is restricted from using the portal.
Restrict Mobile Access: The Employee will be restricted from using the mobile app of PulseHRM.
Send User Credentials: If you select the check box, the User Credentials will be sent to the employee when saved else the user credentials for that employee will be available in the User Credentials page.
Enter the details -> Click on “Next”.
Once clicked on Next, it will navigate to the Asset Management page where the asset can be assigned, if required.
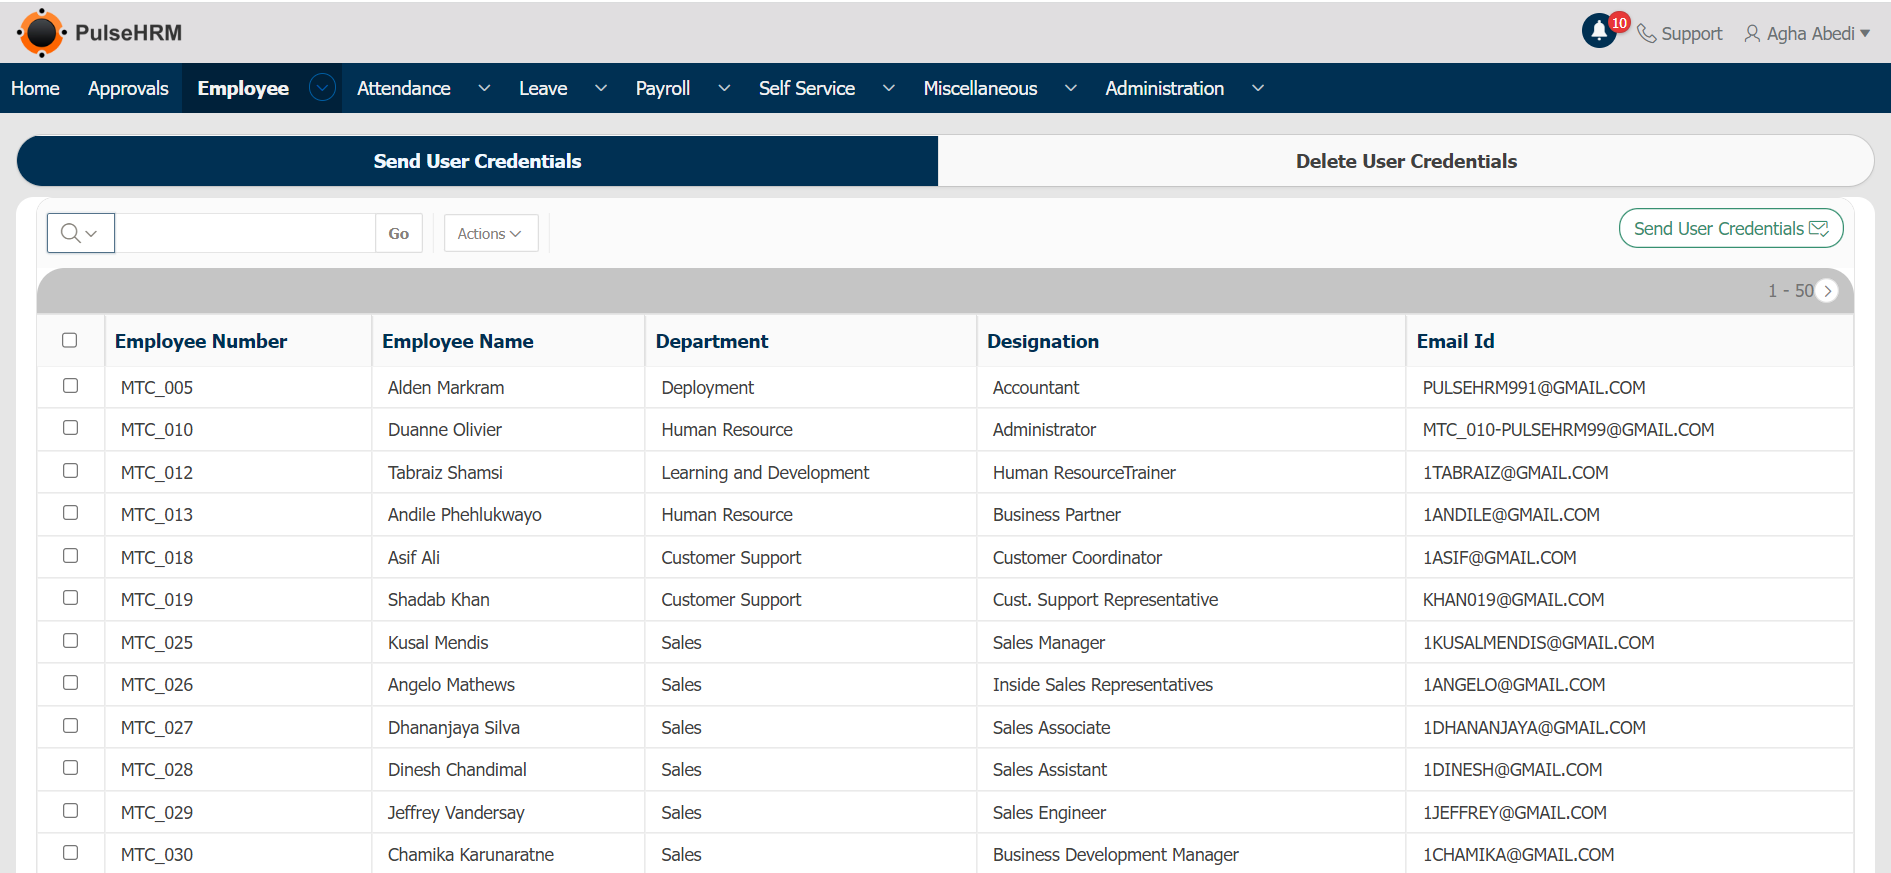
3) User Credentials
Once the employee is on boarded into the portal, for the employee to access the portal, user credentials should be shared to the respective employee. This option is used to share the credentials to the employee’s mentioned mail ID, if the send user credentials check box is not selected in the add/edit employee details page.
To send the user credentials, go to: Employee -> Employee Management -> User credentials -> Select the employee -> Click on Send User Credentials.
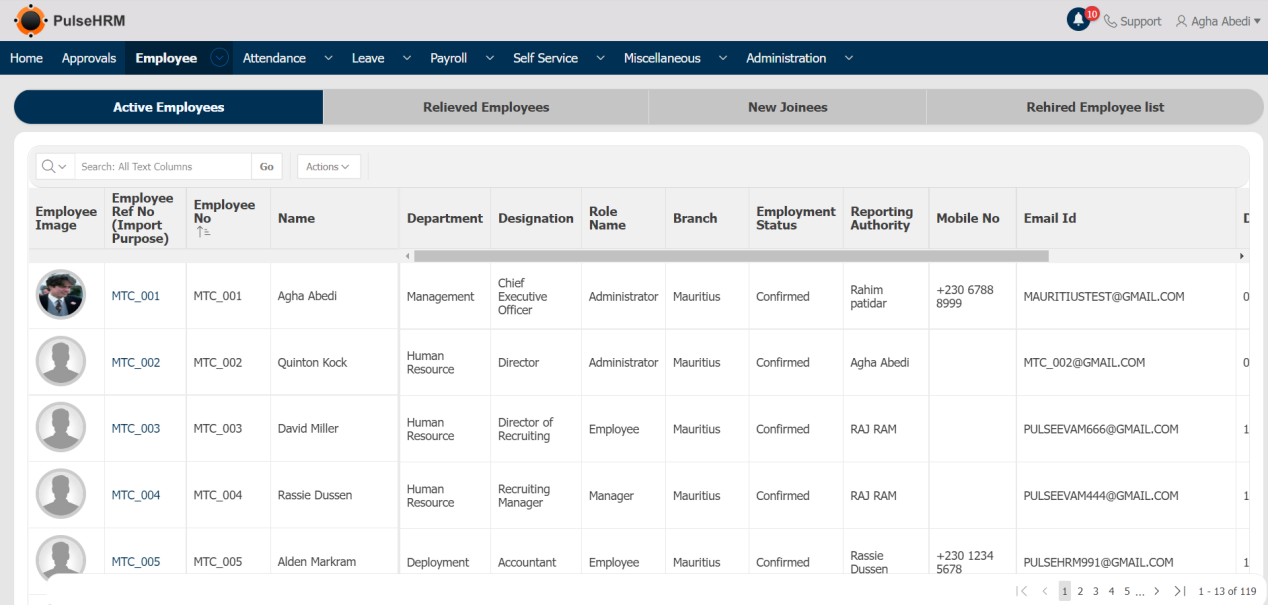
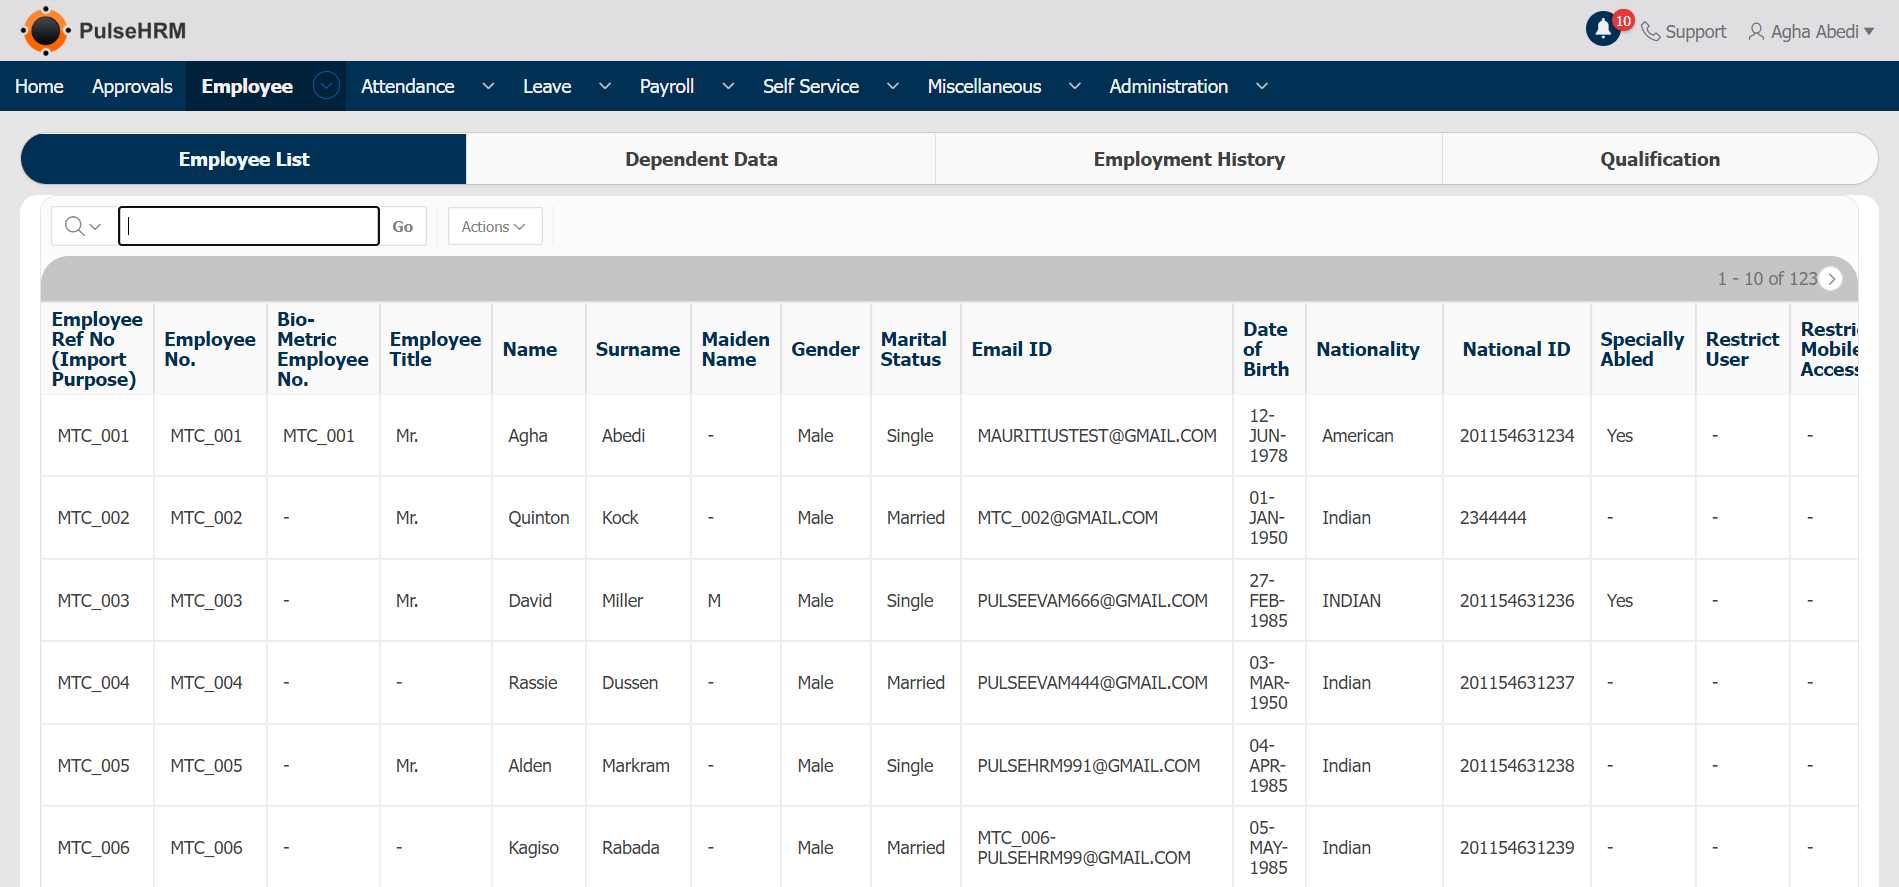
4) Employee List
The list contains of the details of all the employees under four sub modules:
To view the list of employees, go to:
Employee -> Employee Management -> Employee list.
- Active Employee: The details of employees who are working in the organization currently will be displayed.
- Relieved Employee: The details of employees who have resigned from the organization will be displayed.
- New Joinee: Once the candidate submits his/her employee basic details form during the on-boarding process, those list of employee will be displayed.
- Rehired Employee: If the organization hires the former employee of the organization those employee details will be displayed in the rehired list with the old DOJ, old LWD and new DOJ.
5) Asset Management
The asset of the organization can be assigned to the employee in the asset management page where the report of the assigned assets is also available.
To assign the asset, go to:
Employee -> Employee Management -> Asset Management -> Click on “Assign Asset”
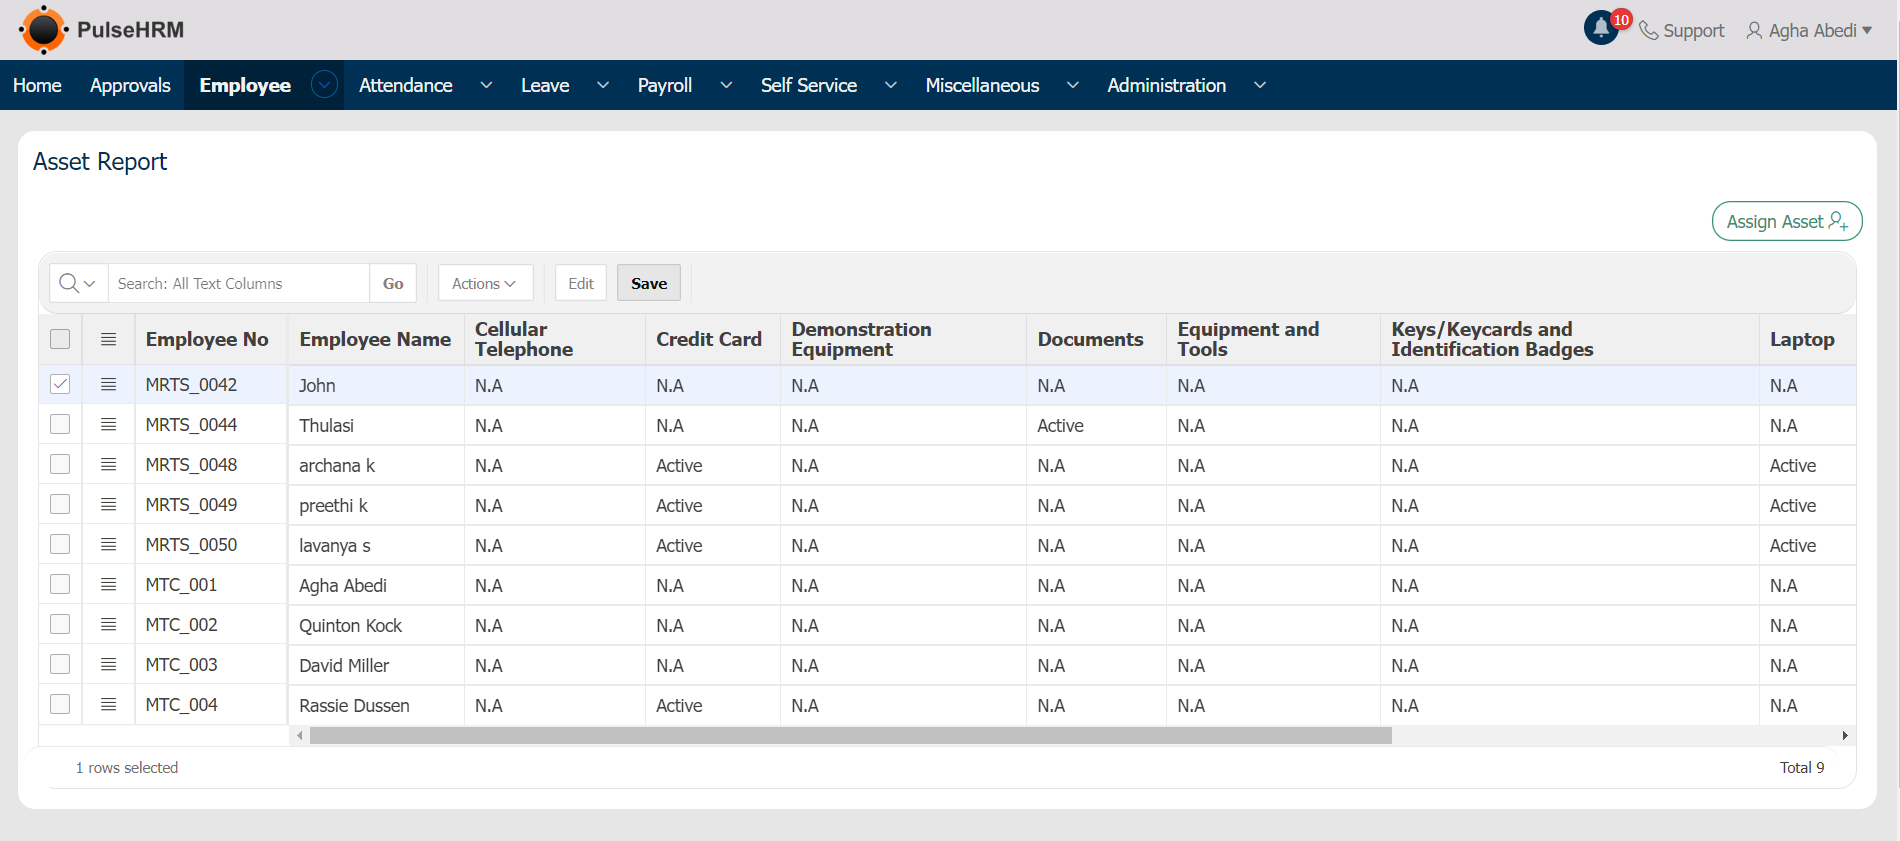
Enter the required details -> Click on Assign Asset

6) Reports
Displays the entire details of the active employees of the organization based on different categories like Employee, Dependent data, Employment History and Qualification.
To View the Reports, go to: Employee -> Employee Management -> Reports
7) E-Docs
The admin can add the documents of the employees through the e-docs option which will be visible only to the admin alone.
To add the documents, go to:
Employee -> Employee Management -> E-Docs -> Click on New Document

Select Employee -> Select Document Type -> Select Document Name -> Upload the document -> Click on Add Document.

8) View / Edit Personal Info
If the employee has done any changes in his/her personal details, then the update request will be sent for approval to the reporting manager of that particular employee. The Reporting Manager can view the changes request in the view/edit personal info option of their login with accept or reject button. If the submitted request is accepted, the changes will be reflected in the employees personal page else not.
To view the request submitted by the employees, go to:
Employee -> Employee Management -> View/Edit Personal Info -> Select the Employee -> Click on Approve or Reject.

The updated record will be displayed in Red color.
C) Off Board
The Employee Management modules maintains the details of all the employees of the organization.
1) Pre-Signed
The Off board Pre-signed page functions in the same way as the on board Pre-signed.
To send the Off-board letter, go to: Employee -> Off Board -> Pre signed.

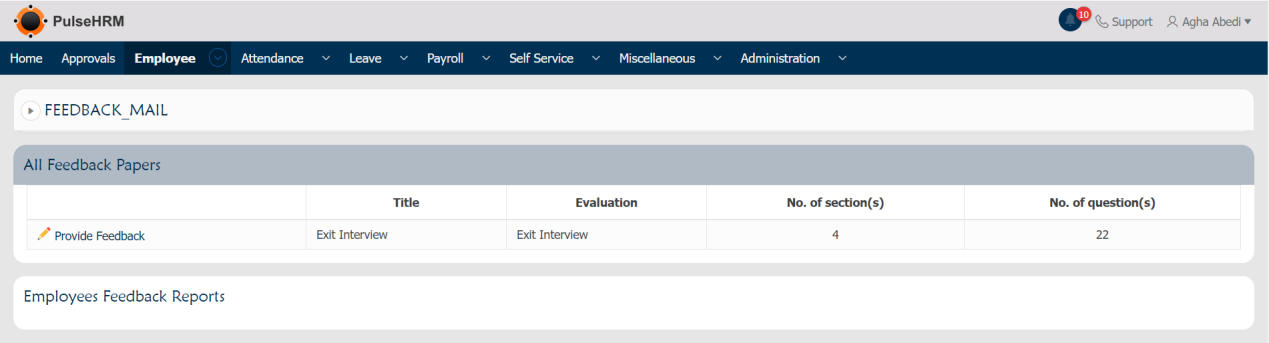
2) Exit Interview
Once the resignation form submitted by the employees is approved by the particular Reporting Manager. A feedback form will be sent to the employee where they will have to fill all the mentioned question and submit it. Those submitted feedback form will be available here in the Reporting Manager login.
To view the submitted exit interview form, go to:
Employee -> Off Board -> Exit Interview.
3) Separation Checklist
It is the final checklist which needs to be submitted by the Reporting Manager of the resigning employee that there is no dues neither from the employee nor from the organization side.
To submit the Separation Checklist, go to: Employee -> Off-Board -> Separation Checklist -> Enter the data -> Click on Save or Final Submit.
The Details will be shared to the HR of the organization.
