Help Center > Time & Attendance Module
Steps for Getting Started with Time & Attendance Module
INTRODUCTION
Time and attendance module is used to track the employee working hours and his / her productivity.
Sub – Modules
1) Shift & Roster
Define Shift: The shift details according to the organization policy should be defined with start time and end time along with the break duration.
To define the shifts of the organization, go to:
Attendance -> Shift & Roster -> Shift -> Enter the details -> Click on Create.
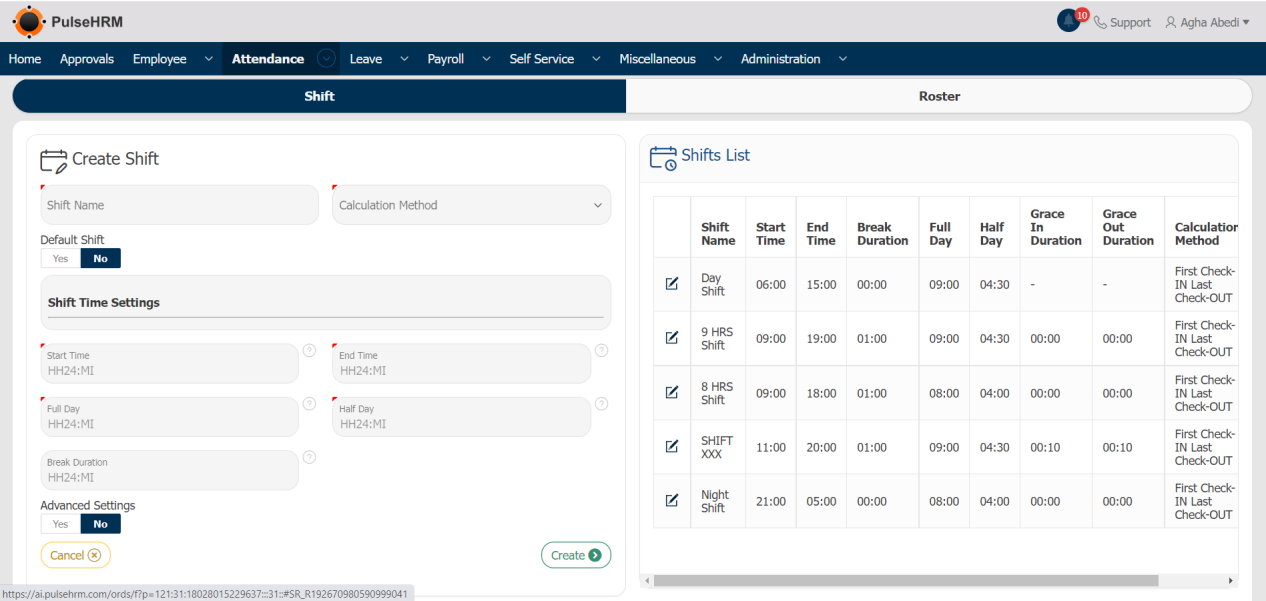
Shift Name: The name of the shift should be entered.
Calculation Method: There are two method of calculating the logs.
- Every Valid Check-In and Out: The no. Of times an employee punch-in and out in a day will be calculated.
- First Check-In and Last Check-Out: As the name suggests, the first punch-in of the day and the last punch-out of the day will be considered.
Default Shift: If Yes is selected, that particular will be automatically assigned to the employees of the organization if no shifts are assigned to them.
Start Time: The Start time of the shift should be selected.
End Time: The End time of the shift should be selected.
Full Day: The total no. Of hours the employee should work for the particular shift in a day should be mentioned.
Half Day: The total no. Of hours the employee should work to attain the half day for the particular shift in a day should be mentioned.
Break Time: The total no. Of hours allotted for break period for the employees should be mentioned.
Advanced Setting: The Grace time allotted for the particular shift can be mentioned.
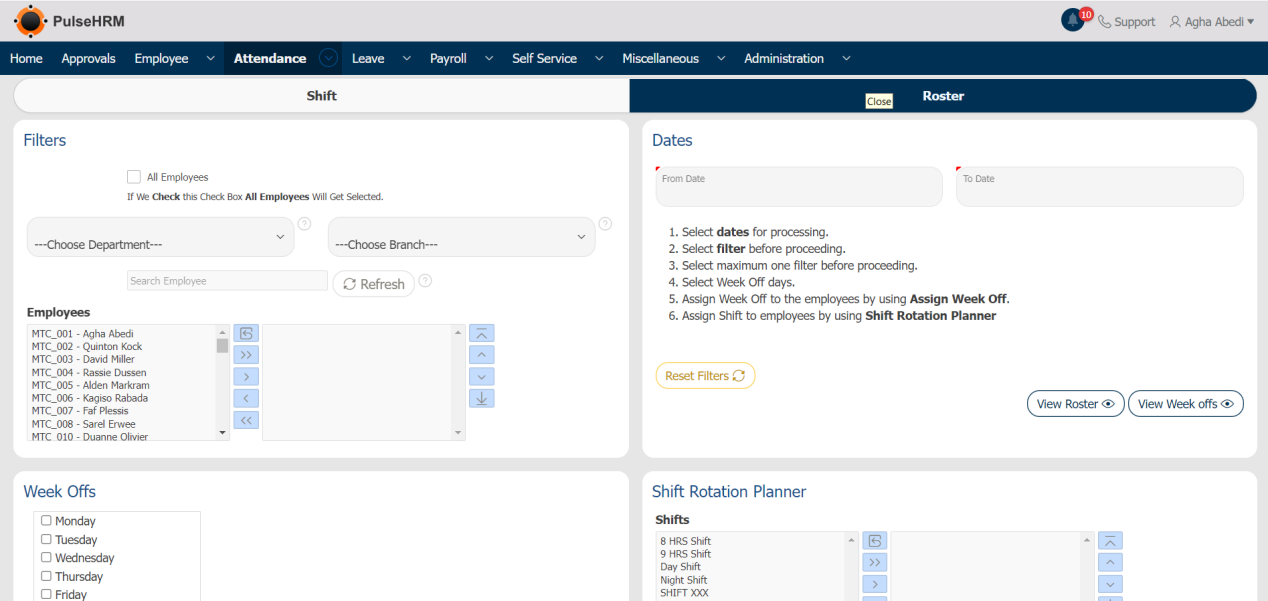
Create Roster – Roster is created in order to define and assign shift and week-offs.
Below are the steps in order to create roster.
To assign shift, go to: Attendance -> Shift & Roster -> Roster.
- Select “From Date and To Date” during which the shift should be assigned.
- Select employees / particular employee for whom the shift needs to be assigned.
- Select week-offs / shifts and click on “assign week off / assign shift “respectively.
- To view the roster you can select start and end date along with the employees and click on “View Roster” button.
- To view only the week-offs for the same roster you can select start and end date along with the employees and click on “View Week-Offs” button.
2) Time Entry and Regularization
In the Admin login, there are three sub modules whereas in the employee login only the time entry and regularization tab will be available.
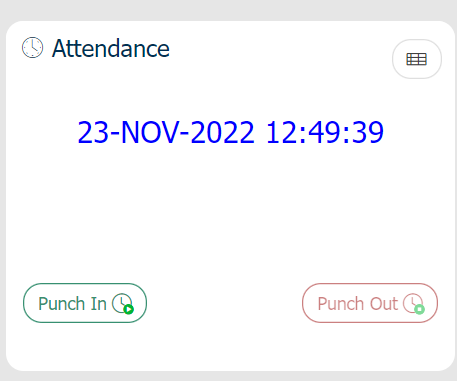
Time Entry: Where the employee can punch in and out
To provide the attendance, go to:
Attendance -> Time Entry and Regularization -> Time Entry -> Click on Punch-in or Punch-out button as required.
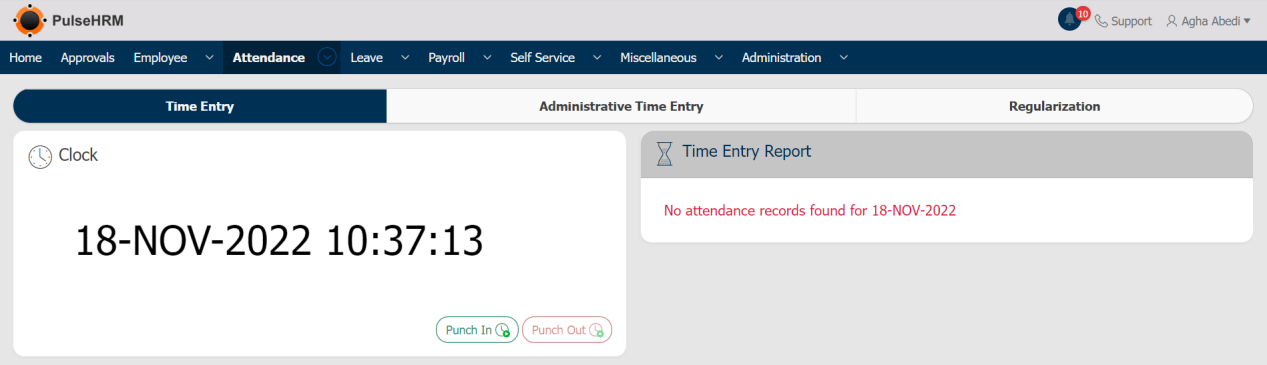
The Employee can punch-in and out from the home page also.
Admin Time Entry: The admin can punch in and out on behalf of the employee for the present date and past dates.
To add the logs for the present date, go to:
Attendance -> Time Entry & Regularization -> Administrative Time Entry -> Select Punch-In and Punch-Out -> Click on Save button.
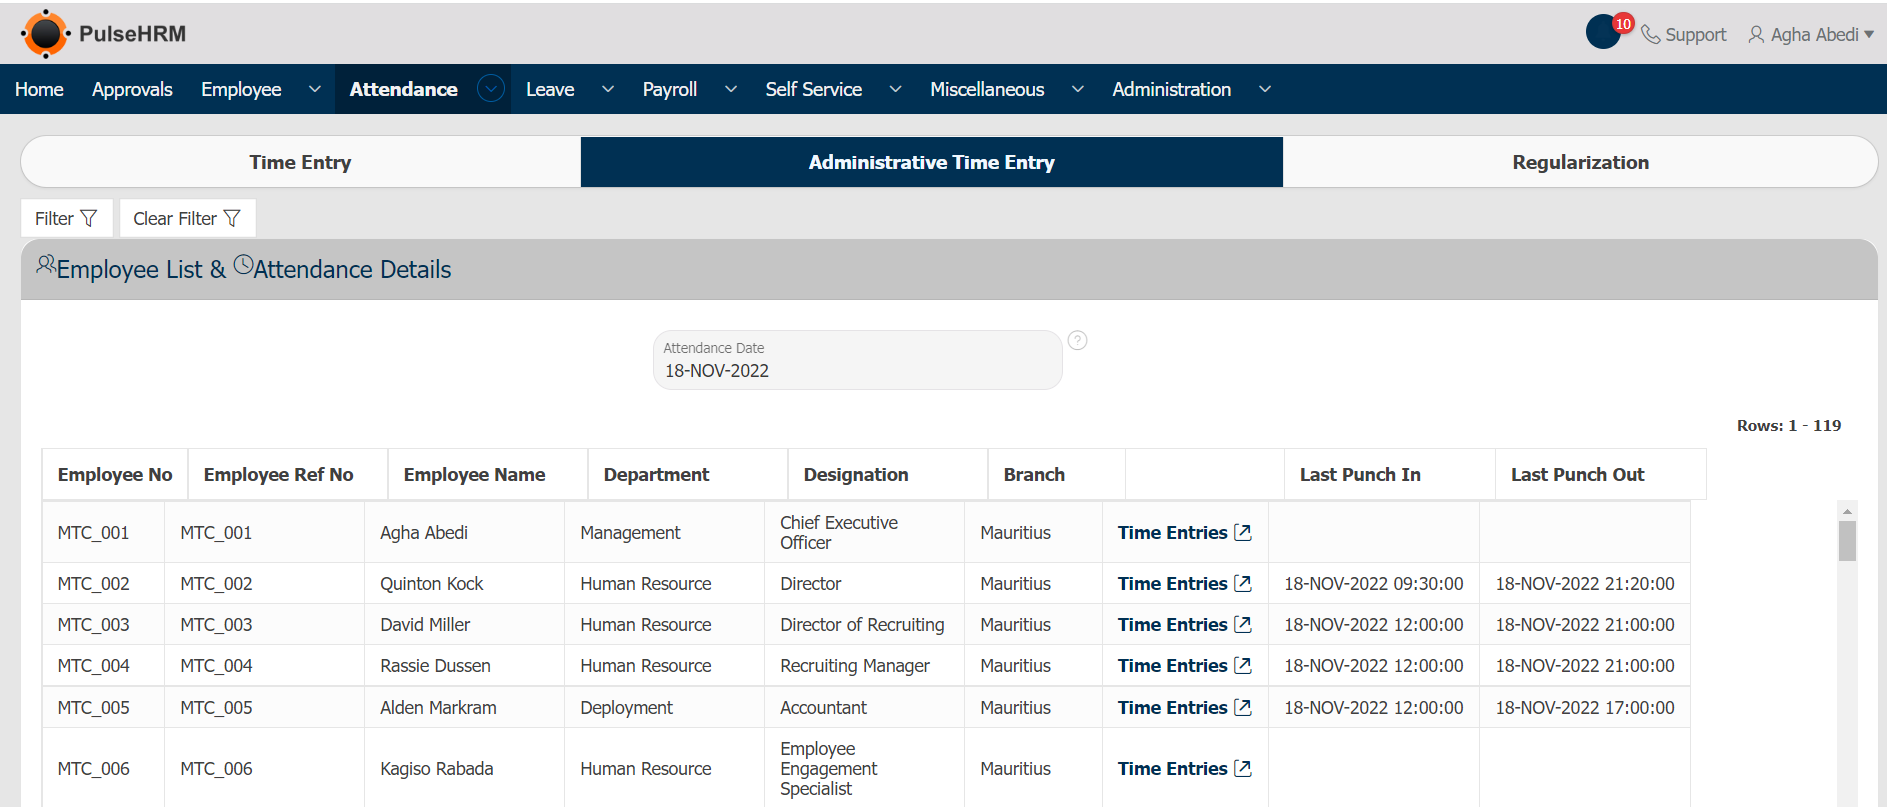
To add the logs for the previous dates, go to:
Attendance -> Time Entry & Regularization -> Administrative Time Entry -> Click on Time Entries -> Select the punch-in and punch-out time -> click on “Save”.

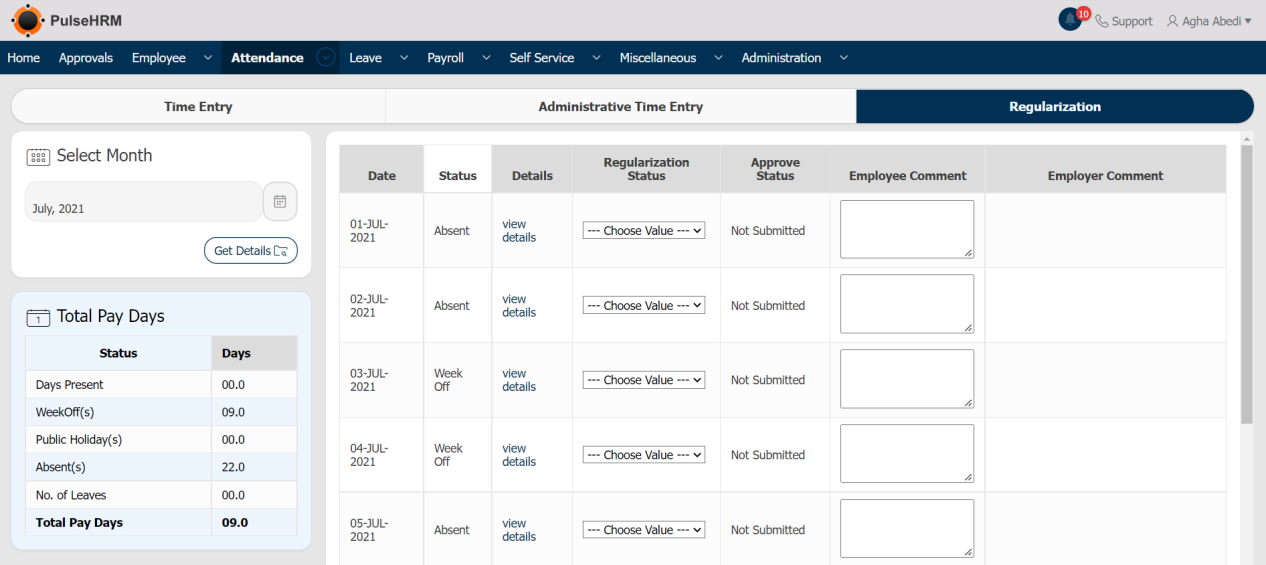
Regularization: The employee can regularize his/her attendance on monthly basis.
To regularize the attendance, go to:
Attendance -> Time Entry and Regularization -> Regularization -> Select Month -> Click on Get Details -> Update the regularization status -> Click on Submit.
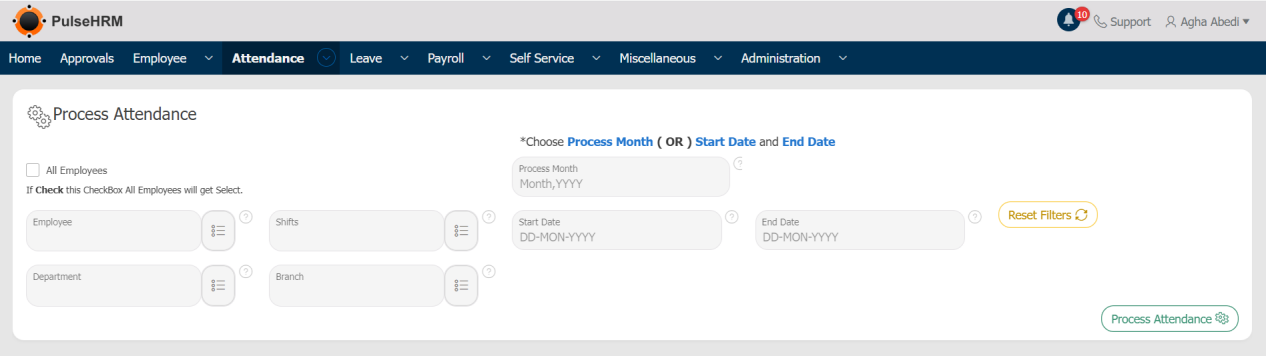
3) Attendance Process
Attendance can be processed based on criteria like date, month, department and location. After the approval or rejection of regularization submitted by the employees, the attendance should be processed so as to reflect the changes in the muster roll.
To process the attendance, go to:
Attendance -> Attendance Process -> Enter the details -> Click on Process Attendance.
4) Attendance Reports
There are different types of reports that are generated. They are:
To view the reports of attendance, go to:
Attendance -> Attendance Report -> Select the required report.
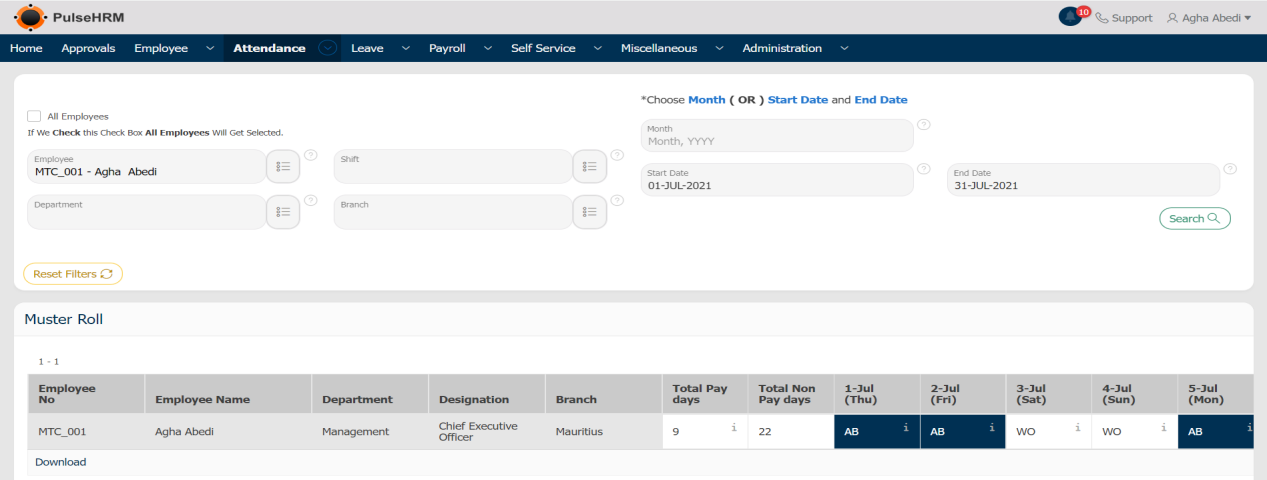
Muster Roll
Muster Roll displays the entire attendance details of the employee for the entire month.
Bio-Metric Logs
It provides the punch in and punch out logs of the employee for every day of the month.
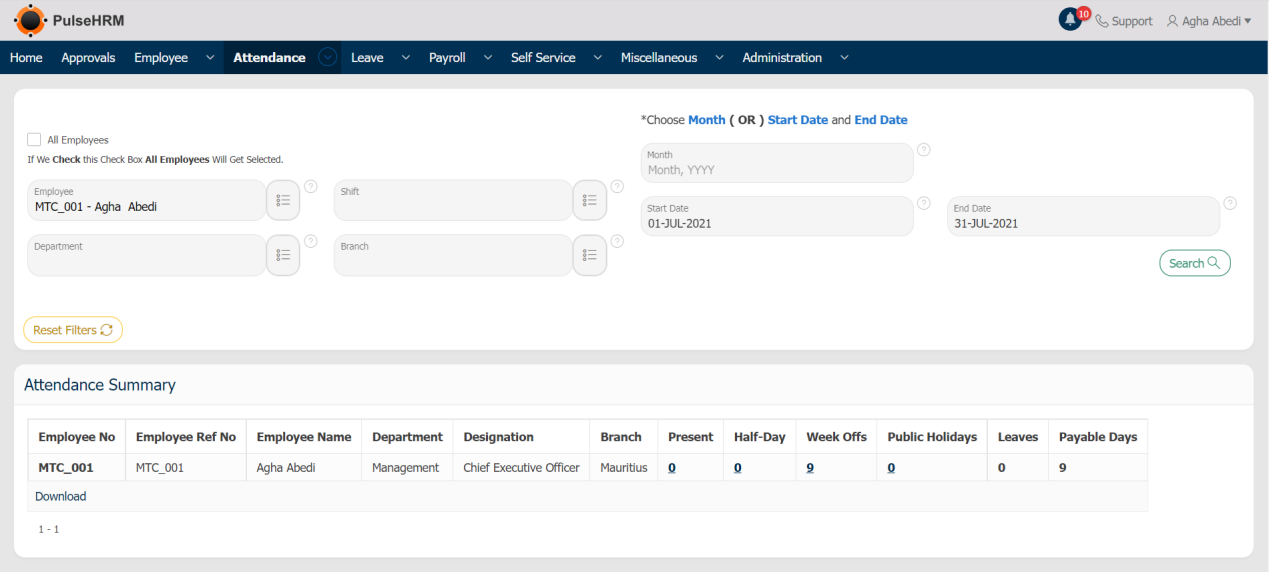
Attendance Summary
It provides the cumulative value of the attendance details of the selected date range or the entire month.
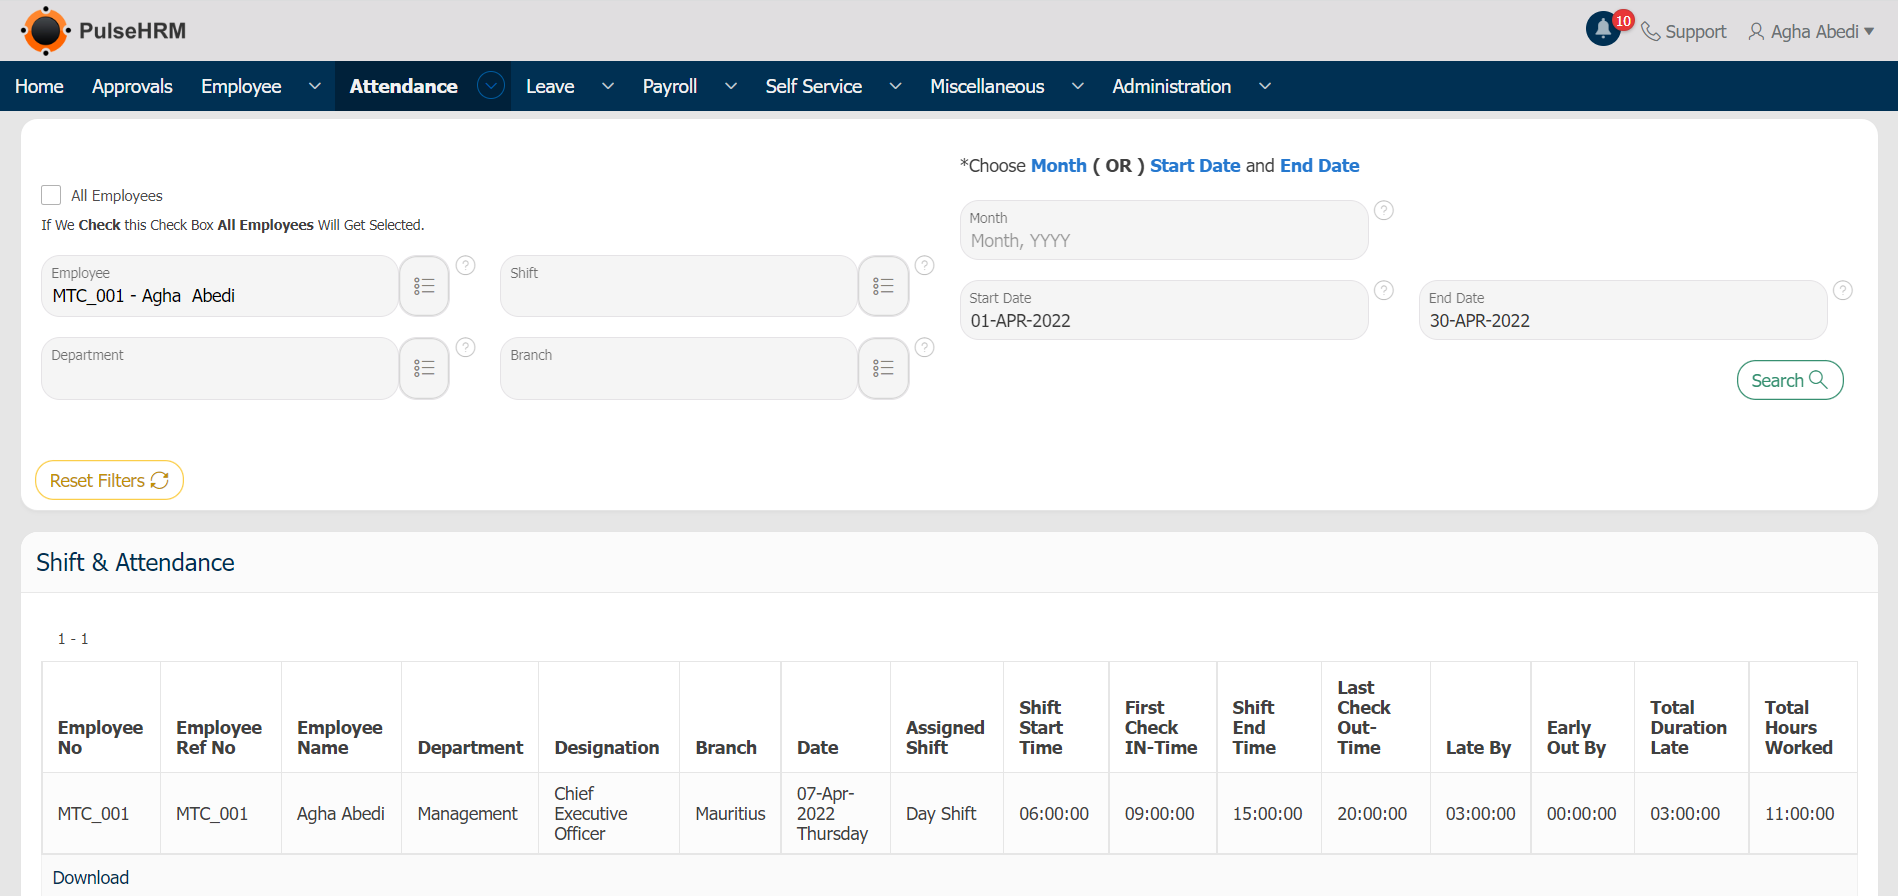
Shift & Attendance
It provides the details of the employees along with the shift assigned to the employees in detailed format.
First Check-In Last Check-Out
For the selected date range or month, this report displays the first punch-in and last punch-out of the selected employee from each day.

Regularization
The report of the regularization request submitted by the employees which are approved and rejected will be displayed.
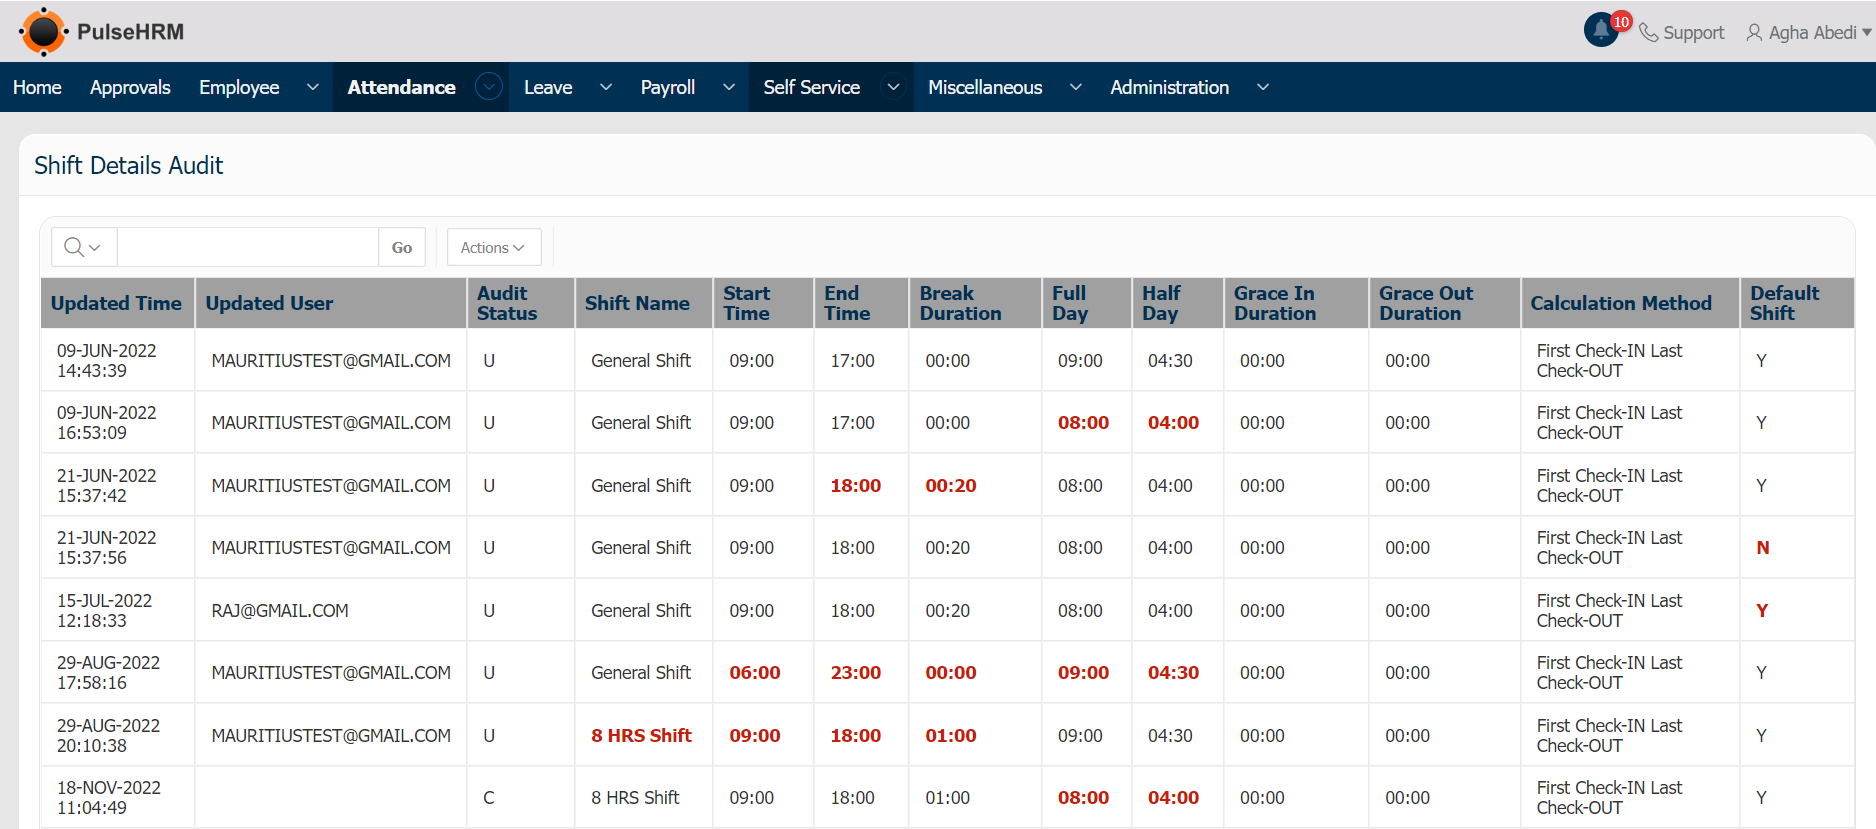
Shift Details Audit
Any changes done by the employees in the shift details defined can be viewed here.
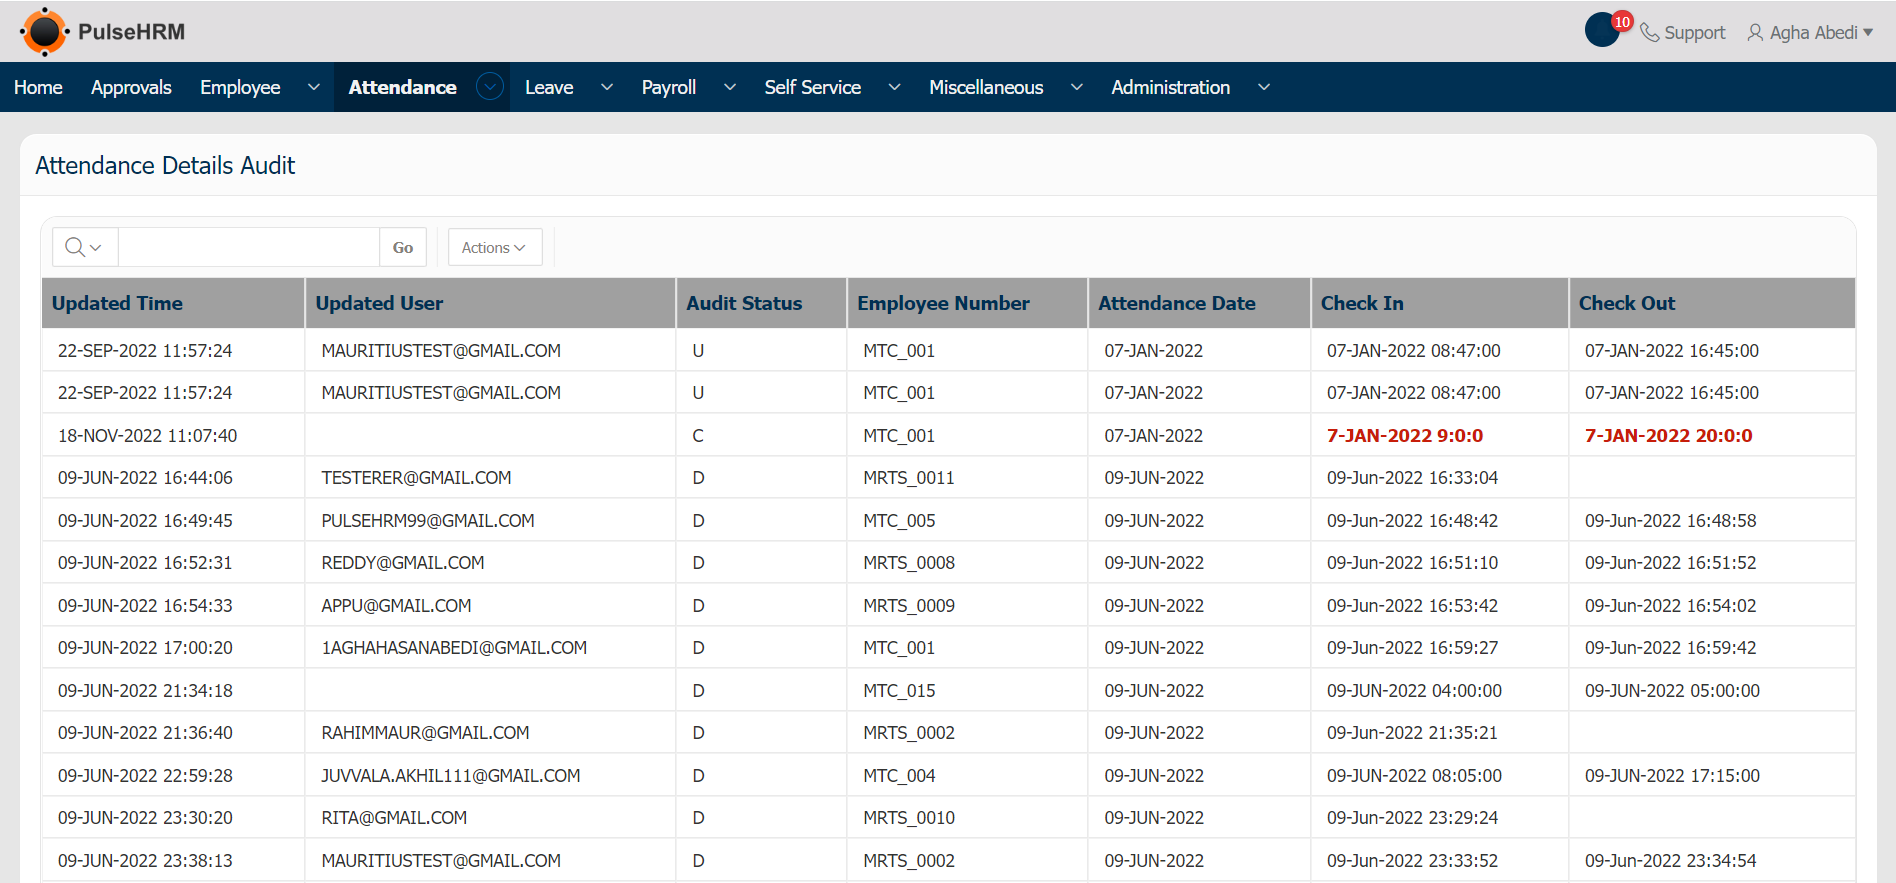
Attendance Details Audit
Any changes done by the employees in the attendance details like punch-in and out can be viewed here.
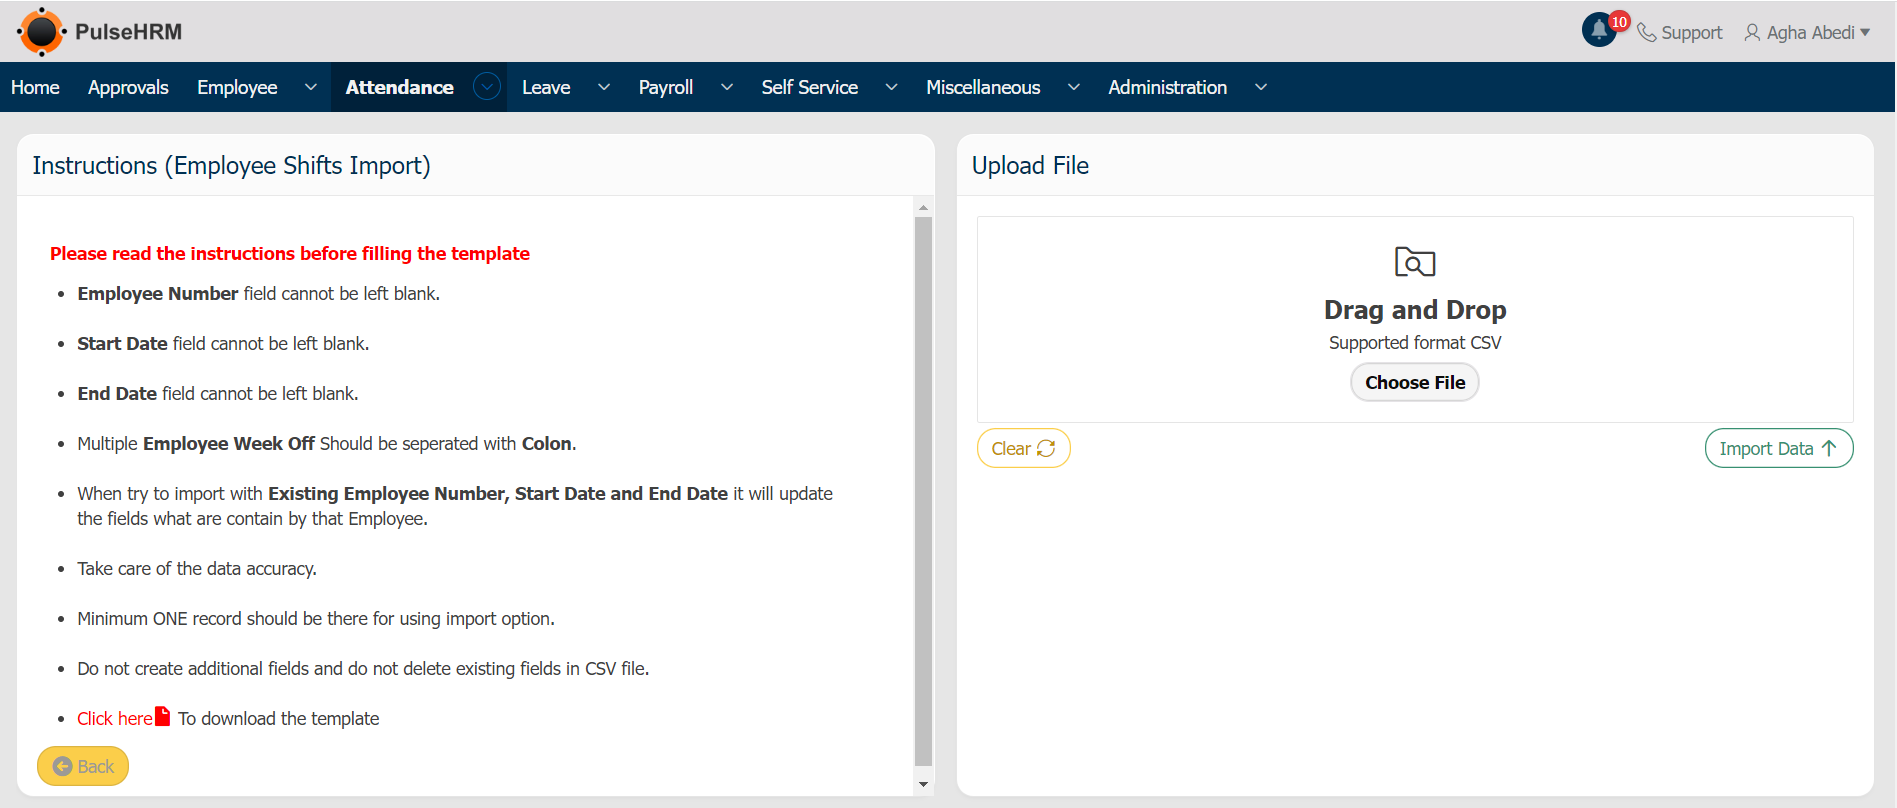
5) Assign Shift Import
The Shift details of the employees can be assigned in bulk with the help of the template available.
To use the assign shift import, go to:
Attendance -> Assign Shift Import -> Download the template -> Enter the details and save it -> Upload the same into the portal -> Click on Import Data.
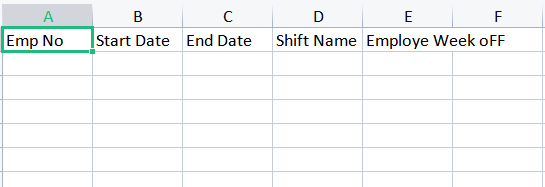
Note: In the template, neither the present headers should not be deleted nor new headers should be added.
The Template for assigning shift
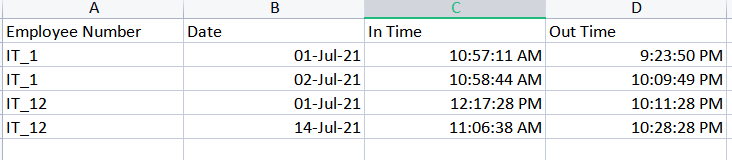
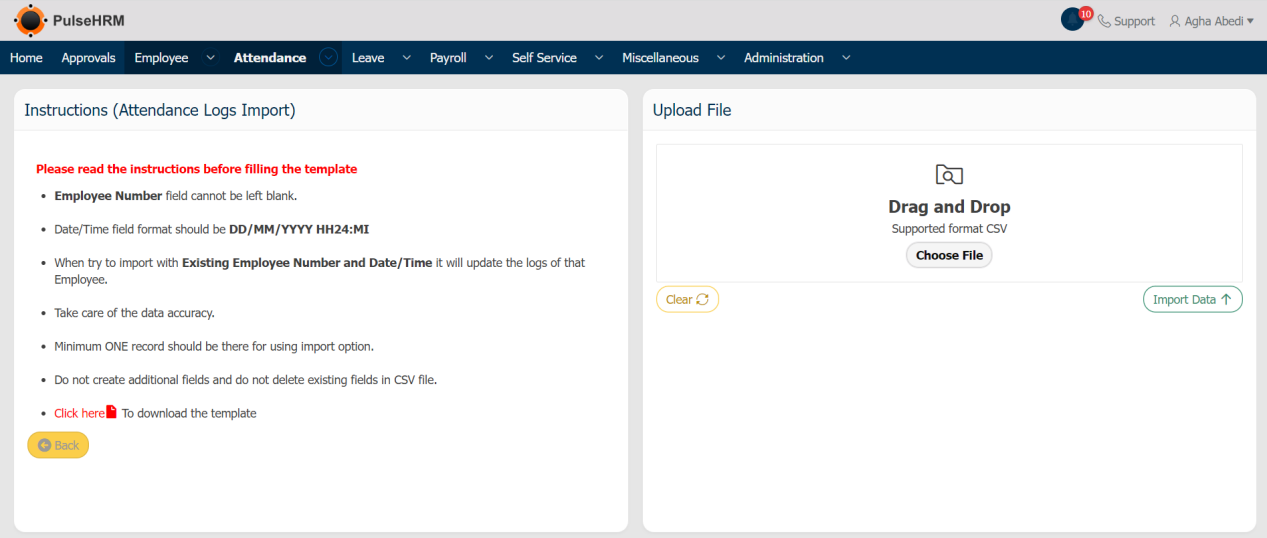
6) Attendance Logs Import
The logs of the employees can be imported into the portal manually. The logs will not reflect in the biometric report instead it will reflect in the muster roll report.
To add the logs into the portal, go to:
Attendance -> Select “Attendance Logs Import” -> Download the template -> Enter the details and save it -> Upload the same into the portal -> Click on Import Data.
Note: In the template, neither the present headers should not be deleted nor new headers should be added.
The template to import the attendance manual report.